What's up?
I've been trimming the coat all day and my neck, back and shoulders want to selfdestruct. Now I will write about the progress while it's still fresh in my mind. Beware lots of photos.
My trim of choice was a 3 cm wide roll of bias tape we had at home. I took the widest I could find because extra width wouldn't hurt and it would more likely cover what needs to be covered better.
I decided to start trimming the upper edge of the collar. Because I'm lazy at explaining how I fold things I'll show you le poorly drawn Paint-quality picture instead. It's probably easier to understand than my explanations anyway. lol
 |
© Valkoinen Samurai
(I have no idea why I drew faces on them.. ) |
And after I had done that I just put the to-be-trimmed fabric between the trim so that the fold runs at the fabric's edge. Like this:
But when I had trimmed a bit of the collar's upper edge I turned it around and...
 |
| It didn't catch! D:< |
Yeah, nothing to do but to unstitch it
(with mini scissors, still..) and try again. But I didn't feel like trying again with the same method so I tried Plan B instead, which looked like this:
I would sew one side at a time
, starting at the inside/wrong side, and make sure the bias tape was sewn on at half its width (1,5 cm) so that when I was done with one side there wouldn't be nasty surprises.. aka not enough width at the other side. Then I would just sew the other side closed. This meant there would be two stitches at one of the sides when I'm done and that's why I started at the inside.
This technique worked better for a start
(even though I had to be very careful with the measuring) and after I had trimmed one side it looked like this:
Then I just stitched the trim on the other side just like I had done. But this time I didn't need to measure, just had to make sure that I pulled on the trim as much as it would go over and stitch it in place.
 |
| I also had to make sure the stitch from the other side would be hidden by the bias tape... |
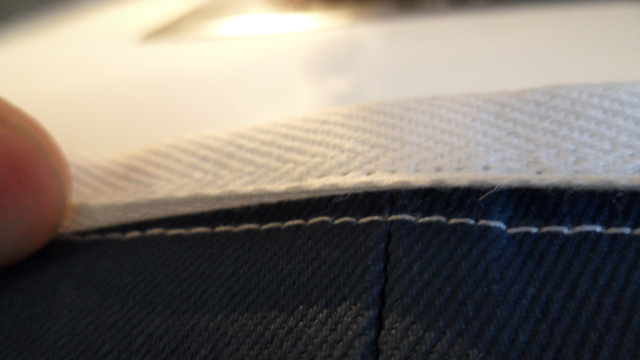
When I was done I thought everything was alright. Until I took a closer inspection.
 |
| Seems okay right? |
But when I lifted the "flap" a bit... (oh why did I even sew that far from the edge anyway..?)
 |
| THAT GODDAMN STITCH IS VISIBLE. I MISSED IT BY A LOT FFFFFFUUUUUU |
Time to unstitch.. again. I must say I was annoyed at this point. Unstitching sure is a bother, especially when the right equipment is missing. It takes longer with scissors and obviously you have to be careful so you don't cut the fabric accidentally...
 |
| Unstitching - Scissors style... |
When I was done unstitching and decided to try again, well.. nothing happened because the sewing thread had magically escaped from the needle. What the hell.
 |
| They see me fleein', they hatin' |
Okay, I was starting to get annoyed at this point. Really. What's with all these fuck-ups piling up when I have barely started? My face was like.. oh, I know.. Masamune himself can demonstrate:
Yeah, go figure. I bit my lip and continued. For some reason the trim decided to do like I wanted this time and you know what... it looked okay =
Good. Next thing to do was to figure out how to get a nice change of direction on the collar trim because now I would be going downwards. I played around with folding the end in different ways and figured the basic fold
(like on that poorly painted tutorial) worked the best, except that the folded trim edge I folded over to the fabric's other side and when I folded the trim lengthwise that folded edge got hidden. This photo doesn't show it clearly but at least something:
When I had settled on how to that bias tape direction change thingy-whatever-to-call-it I just continued to sew along the front body of the coat until I got to the first spike. When I got to the spike I folded in the edge of the trim
(which I had now cut off from the roll) somehow so that it was sort of point shaped.
 |
| One side of the trim attached (Plan B style) |
I then just sewed the trim on to the outside side too and when that was done I added the trim to the other half of the coat too...
I started this time at the first spike and made my way up to the collar. Of course when I got to the collar I just had to screw up again.
 |
| Dat stitch. |
Yeah, unstitch again and fix it. It was a measurement mistake, there wasn't 1,5 cm on both sides so the side with less suffered..
 |
| Just showing how I made the other side of the collar when I got to that point where the direction changed... |
After I had fixed the collar issue I had both front outsides (center trims) of the coat, well, trimmed. I thought I had been through hell already but hell was just starting... all those spikes were next up. Oh lord.
 |
| Front center trims done.. now to get spiked... |
Now I don't feel like I even know how to explain how I did the trim around those spikes so I will just post the photos I took during the process instead. Oh, when I did the spikes I switched to my first way of attaching the trim, aka sewing both sides of the trim closed at the same time.
 |
| Finished spike point (V-shaped) |
 |
| I did a slight cut in the middle when I got to the upside down V-angles.. |
 |
| ... and folded the trim edges so that they met. (other side not folded/sewn on picture yet) |
Oh, and while I was sewing at one point I noticed the machine sewed on the same spot and just wouldn't move. Okay sure there was a lot of fabric layers there but it seemed weird it wouldn't move even if I helped to push the fabric... and the machine sounded weird so after a few tries to get it to move I took the fabric out and checked the threads.
 |
| The mischief maker - knotted bobbin thread |
Soon after that the sewing machine decided a knotted bobbin thread wasn't the only misfortune it wanted to inflict on me. The sewing needle broke too. Fucking great...
 |
| Sure isn't my day today... |
Oh well, a lot of painstaking care and tedious hours later I had finished all the spikes. I went through hell and survived!
 |
| The outside looks nicer because I sewed on the outside and it's the side that will show anyway.. |
I took a break because my body was killing me.. but I decided I would finish the coat today so I came back after about 20 minutes to trim the arm openings. I had to think a while how I would go about trimming them because as I mentioned in the earlier post they are V-shaped and not curved/rounded. This makes attaching the trim all around a hassle and difficult. I decided not to add trim completely around.
 |
Sewing arm opening trim..
(I took off a part of the sewing machine so I could put the sleeve around it and roll it around) |
 |
| Finished arm opening trim |
 |
| Close-up of arm hole end.. |
And with that Masamune's battle coat is finished. It took forever and was a major pain in the ass but it is finally
done!
And now I really don't even want to see bias tape or think about trimming anything for the next few years. Even thinking about getting to work with armoring seems that much more pleasant...
Bye bye!


Wow... it's not exaggerated when you're saying you went through hell. This trimming looks like a major pain in the ass - but you survived! And it looks fucking great! You did an awesome job on this, congratz! ^_^
ReplyDeleteDSAJFS;LFsk;f ZOMG DAT COAT LOOKS SOOO AMAZING!! *_* Dang, you went through absolute hell with that bias tape, but still came out on top! It's really impressive that you stuck with it despite all those problems and finished it in a day, to boot. If it were me, I probably would've dragged it out to two weeks or more. xD
ReplyDeleteTake a good rest man, you deserve it! Fabulous work ~!
en kestä miten hyvältä toi daten takki näyttääkään ! ja toi et pitää ommella jotain nauhaa siihen reunaan on ihan hirveetä koska bscjkdnkv : D
ReplyDeleteWow. It's just so gorgeous after that all work...! You must be proud of your skills ^3^
ReplyDeleteThat bias tape was trolling you big time! But the finished coat looks great. ;D
ReplyDeleteSengoku Basara cosplays sure are a lot of work. XD
Alan itkee ku oot noin hyvä <3 :D
ReplyDeleteHyhyh. Tiedän todellakin tuon vinokanttinauhan laittamisen tuskan >___> Naruton kanssa sai leikkiä turhankin paljon!
ReplyDeleteMut oikein hyvältä näyttää! Pitäis itekkin joskus alottaa Yukimura projekti tästä sarjasta ((: