Showing posts with label worbla. Show all posts

January 30, 2018

MH4U Eldaora's Taus Hunting Horn cosplay prop [part 7]

Hello blog readers and MonHun fans!

Here comes the seventh and final part of my huge Monster Hunter cosplay build project – I'm making a Hunting Horn called Eldaora's Taus from Monster Hunter 4 Ultimate, one of my most played video games to this day. I've been a major fan of the franchise ever since I played Freedom Unite all those years ago and yeah, for the longest time I've dreamt about making a MonHun costume!
I am currently only making the weapon but I will, of course, make a complete armor set later and I think I have it planned which one it will be, hehe.
If you have no idea what I've made before this part you can check all previous progress posts here: 1, 2, 3, 4, 5, 6

Note: this project is split into several parts because otherwise it would turn into a kilometer post; I need to document my progress carefully (many photos etc) since it's a school project.

Let the final quest commence!

Adding black worbla to a horn.
So yeah, last time I ended the post with the coloring and weathering/shadowing of the Hunting Horn and what was left to do was to finish painting the head, horns and ears and to attach them. Before worrying about the whole "how the hell do I attach the protruding parts?" issue I decided to first do the worbla episode out of the way.
I had bought two rolls of black worbla for more than a year ago and now I got some use for it; I've barely worked with worbla before this (only done really small and/or easy details) so yeah, I'm a beginner when it comes to worbla. ^^" Frozen Angel helped me by providing an extra pair of hands when I applied the worbla onto the horns on 13th November. I noticed early on that the worbla, when heated, had a tendency to sink into the hollow spots of the chicken wire base under – this was not really a surprise in the sense that I knew that worbla is thin/flimsy by itself, but somehow I had counted on it to not sink in that much; it was as if the aluminium foil wrapping wasn't even there because the worbla just revealed the hexagon shapes of the wire net under, which created a bumpy-appearing texture on the horns. I must admit that I didn't like the bumpy and wrinkly look that it gave at first (I originally expected a smoother application) and was terribly disappointed with both the result and myself for not having had enough time and knowledge to make the base smoother.
I was looking at the horns with this disappointed face as I went on, thinking that I'm wasting expensive worbla as it's not turning out how I had hoped. But as I continued I remembered that the main body of the Hunting Horn is not smooth either and yeah, the imperfect horns would probably look alright on it after they get painted and attached. After all, I went for a more realistic approach with a more battle-worn look and thankfully, because it's a Monster Hunter prop and not a perfectly sleek anime prop, it only makes sense that the thing looks like it has seen better days since it has been used to beat larger than life dragons into a pulp...

I finished covering both horns in worbla, which meant cutting out a lot of 5 cm wide strips and wrapping them so that they overlap each other. I worked myself from the tip down to the base of each horn. I also feel like mentioning that I got the impression that black worbla tears easier than the ordinary worbla (the brown one) when heat-shaped as I several times got it to rip when pressing seams to get them to disappear etc.

Next up was to cover the ears. Now I couldn't do the same approach and so I did a "pattern test" on a paper towel as that was what I had at hand in the garage. The pattern wasn't anything exact but just to give some kind of idea of what worbla shape I could work with.

Worbla pattern test for the ears.
The ears of course got wrinkly too (they had the same base under as the horns) but the wire net's hexagons didn't shine through as much as on the horns but, then again, the ears had a bit more foil to them and I didn't press in the worbla as carefully as on the horns (to avoid gaps in the overlapping "ridges"). At this point I didn't even care about the wrinkles and uneveness as much as I had started thinking that it just looked more natural or realistic somehow or at least that's what I tried to tell myself.

Worbla-covered ears.
Now with all the parts covered in worbla I came to the hard part, namely figuring out how exactly to attach them. At times I wondered why I did not do it much earlier but then I remembered that if the horns had been on already it would have been much harder to rotate the whole build for the painting process...

My stepdad came over to brainstorm and we ended up agreeing on that the safest, and probably only reasonable approach, was to cut out holes to sink the horns and ears into. It felt a bit barbarian to go in with a knife and cut up all that hard work but oh well, gotta do it to get the horns to stay on safely. Besides, now that the horns were wrapped in worbla they were also notably heavier and thus we had to make sure that the holes that got carved out were deep enough to lodge them securely in place.

Marked horn placement on the head.
It was important that the hole was carved at an angle (towards the face) and not just carved out straight downwards, if that makes sense. It's a bit hard to explain but the way the hole was carved would directly affect in what position the horns would stay up when sunk into the hole; I didn't want the horns to stand straight up but be curved backwards and thus the tilted angle was really important to achieve the proper placement.
While test-fitting the horns we noticed that we'd need to slim down the base of the horns (since the head itself is quite narrow) and so I reshaped the base by using a heat gun and pressing it together to be more of a wedge, with downward curved sides, instead of the original round-ish shape. I reshaped the base of the ears as well but only made them a bit smaller in diameter, while keeping the round shape.

Hole for the horns carved out and test-fitting.
Once I saw the horns test-fitted onto the whole thing I started to warm up to them, somewhat – their rugged, worn, irregular appearance started to look pretty cool in their own unique way.

I carved holes for the ears as well, although these I didn't have to angle as much as the horns and pretty much just carved straight downwards. I had to pay attention so that I didn't end up carving out the ear holes too close to the horns; there would need to be some mass between the horn and ear holes for support.

Hole for one ear carved out.
Test-fitting horns and ears together.
The placement of the horns and ears seemed fine (thank God, it would have been horrible to make a mistake at this point!) and so I continued by spray priming the separate parts. Because it's basically winter here by now it's not really good, nor recommended, to spray outside because of the cold – this of course is a bit of a problem since I can't control the weather and I needed to spray paint. :'D The solution was to keep the garage door open and spray in the big open area (where the cars usually are, but during the time of day when I sprayed both mom and stepdad were at work) and pray that I don't accidentally spray something around me...

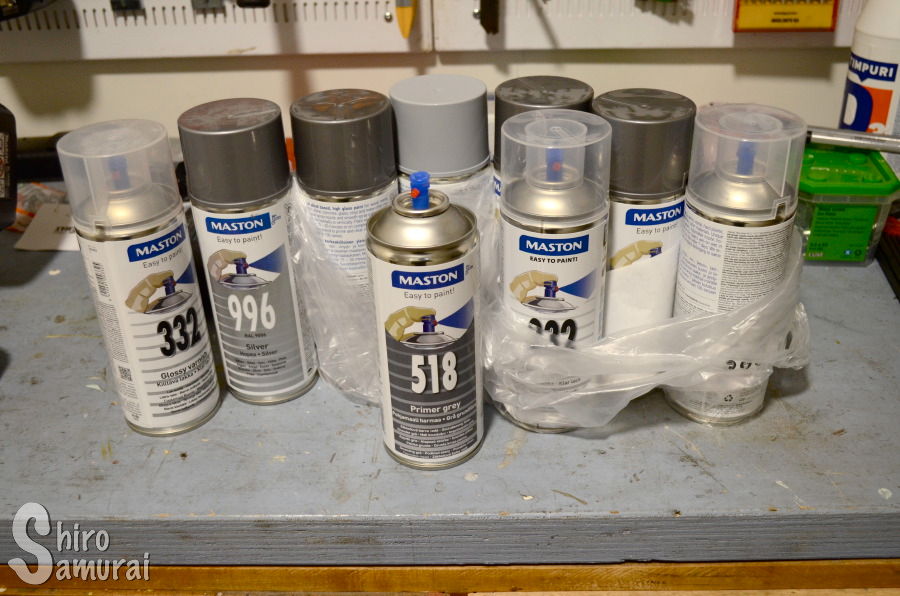
Priming in progress.
Ignore the random chainsaw in the background. XD
I primed all the parts and left them to dry in the garage. The drying time took longer than usual since it's cold indoors but oh well, I'm happy that I can even spray paint right now since the temperature has been dropping to -10 °C the past days while I was painting (16th November). I have this unsuccesful experience from trying to spray paint a prop sword in the middle of winter several years ago and the paint kind of "froze" and made this cracky, frosty surface on the sword; it ended up looking pretty ugly and I had to sand it out and repaint it. Don't want to risk the same thing happening again...
Oh and yeah, as a disclaimer I want to state it, in case someone is wondering, that I did indeed skip sanding and smoothing the worbla before painting. This was intentional because at this point I don't have the time for it (this prop needs to be done before school ends before Christmas) and I'm going for a worn and imperfect look anyway. One good thing with black worbla though is that its surface is smoother than regular worbla and thus it's pretty okay as-is and requires less work to look decent.

Once the primed parts had dried (I left them overnight) I did two coatings of silver spray paint on them. I left them to dry overnight again and on the following morning I went with stepdad to attach them; we had brainstormed through all possible adhesive candidates from wood glue to 2-component glues but settled on using PU-foam. The reason for this was that "it sticks like a disease" (stepdad's way of putting it :D) and because the majority of the Hunting Horn itself is foam as well it only felt natural that it would stick to itself. Also, because the foam expands it would also help in, at least partly, reseal whatever gaps or excess we carved out that was left around the horns/ears after being inserted. 

What we did was to take a can of PU-foam, spray a gentle click into each hole (one at a time) and some onto a piece of cardboard. We then took one horn/ear at a time, dipped it carefully into the expanding foam on the cardboard and then stuck it into the carved hole. If it didn't stick properly we took a tool (in our case a screwdriver because it was close at hand) and used it to spread around and even out the foam inside the hole, so that it would cover most surfaces. It was important that there wasn't too much foam in the holes because otherwise, once it started expanding, it might push out the inserted parts – but, on the opposite end, if there wasn't enough it might not get a strong enough hold and come off.

Horns and ears freshly attached. Notice the foam leaking out.
We made sure to angle both ears slightly upwards when inserting them and check so that the horns had approximately the same placement and curve to them; of course it was hard with the horns because they weren't symmetrical to start with (we even noticed after lodging them in that one horn is a bit longer than the other! Ceadeus laughs somewhere) but as long as it was "close enough" it was good.
Upon inserting each piece some foam would naturally seep out, which was pretty much a good thing because at least it would be sure to stick. I didn't try to clean up any of the excess foam as it would create a mess and be much harder to get rid off when it's fresh – it's wiser to wait until it has completely dried and then just cut it off. To play it safe we moved the whole build close to a wall (so that at least the longer horn wouldn't get pushed out) but, thankfully, because the fitting of the horns was snug they stayed up on their own and didn't need to be taped down, nor did they need any supporting structures to be placed under them.

 The last progress was done around 19th November and it took until 8th December before I got an opportunity to continue on this project. When I returned to check how the horns and ears had stuck I noticed that my stepdad had already cleaned up some of the " foam spillage" while I was away. I took a knife and cut off the small remains that I saw.

Excess foam remains cleaned up with a knife.
Now, to smoothen and seal the attachment points and whatever remaining gaps there were, I used some acrylic sealant again. I felt so fucking dumb (yes, I had a bad day) because I didn't notice that the cap was on when I started and so, when I took it out, the acrylic just went everywhere like an angry snake because of the built-up pressure. It was a mess and I wanted to die or something – stepdad had shown me just before how to use it and of course, as soon as he left, my dumbass self fucks things up. :)) #accomplished 
The only thing I could think at that point was my new-found motto "ois kiva jos onnistuis enemmän niin vituttais vähemmän".

Acrylic sealant.
I applied acrylic sealant around all the "seams" and smoothened it down with fingers dipped in water. This was a bit tedious to do as I needed to be careful because if my fingers weren't moist enough then the acrylic would stick to my skin but, on the contrary, if my fingers were too watery then the acrylic would turn runny. Hard to keep that perfect balance that was the best to work with.
It was also really hard to get to the gap behind/under the back of the horns – it took some rotating and cursing and some really precise application to get there. I used a piece of this kind of thick bendable plastic rope(?) that I used as an extension of my hand to get to otherwise impossible-to-reach spots.

Acrylic sealant added.
I left it to dry overnight. Once it had dried some days later I noticed that the front had sunken in a bit and the transition point was thus showing from under the acrylic. I applied some more acrylic and left it to dry again.

Christmas stress happened and I didn't get to continue on this project past my school's due date for it. Luckily I was basically about 90% done and could use my progress up to this point in the oral presentation that I had to do for my teacher a few days before school ended. With the deadline out of the way I could now do the remaining work without having to worry about time constraints, which meant that on the very last days of December I took up the work again.

Acrylic seams painted over.
On the photo above I had hidden the acrylic seams by spraying them silver. As soon as they had dried properly I could finally start to paint the head! I did the red parts first, just like the previous time, and used my 4U game as a reference to check how the face markings approximately went. I also put some red on the ears and the upper half of the horns.

Head painted red.
Once the head was painted I turned it around and painted the backside of the horns and, while at it, I decided to fix one detail on the body of the Hunting Horn that had been bothering me since I made it. You see, earlier on the painting process I ran into an issue of the body patterns not lining up and decided on a whim to add a "cross section" on the top part of the body to try and make the distances appear smaller. It's really hard to explain what I mean but in the previous post I mentioned that it was impossible to get the details to be symmetrical because of its size and because I could never see the whole thing at once while painting it (because I had to constantly rotate it). So yeah, while the crosses lined up okay on the front the backside messed up. And I'm not gonna lie ever since I did that one additional cross it had been bothering me extremely much and now, when I was painting the head anyway, I decided to cover it up.

Cover-up. Great example of how much difference the darkening
with black acrylic did to the original color.
Once the red paint had dried I went over it with black acrylic to darken/weather it. I used the same technique as last time, which basically meant applying paint and then quickly wiping most of it off with a paper towel. When I had gone through all the areas with black paint I took the green acrylic (which I had borrowed from art class) and painted the base color of the eyes with it. I left it to dry after that.

It stayed untouched for the remainder of December and a majority of January (I wanted to complete it earlier but school happened). I finished painting the details of the eyes on 28th January. Sadly the green base paint had cracked a bit and it partly peeled off when I was drybrushing the black onto the edges of the eyes. Good thing I managed to hide it by painting over it and now the tiny cracks are hardly visible, success!

Eyes painted.
Now I just had to add a couple or so coatings of clear varnish to seal the whole thing and then it was done! The varnish protects the paint and it's thus always worthwhile to finish a project by sealing it with clear varnish, especially if you want the paint job to stay on longer. My varnish was glossy so it also gave the surface this nice shine to it.

Below are photos of the finished Eldaora's Taus. *basks in the glory*


Not gonna lie, I feel like I've surpassed myself with this project and I'm extremely proud that I even managed to make such a big and challenging cosplay prop (it's very different from anything I've done before!) but, at the same time, I know I could have done it even better if I would have had more time, money and patience. Improvements would have been stuff like making the horn/ear bases smoother, adding worbla to make layer differences and raised details on the shaft, mixing in some brown paint for even more color details and such maybe one day I'll go back to this project and upgrade it or not. Whatever the case, I love this massive beast of a prop and I'm happy that I gathered the courage to even attempt to make it in the first place. Gotta believe in yourself!

But hey, my Hunting Horn (aka my first Monster Hunter cosplay part) build process is over with this post and I'm more than happy with how it turned out in the end; it took a crapload of work, sweat and tears to make but now it's done and ready to swing into action! I can't wait to make an armor set and wear it out to a con, it's gonna be gargwawesome!
Next part: come up with a way to add the sound effects.. although I think I'll have to provide the toots myself, for now. xD *enter Hunting Horn sounds here*

Thank you for reading and do leave a comment if you found this project of interest! Would like to see more Monster Hunter builds from me in the future? Hunt safe and don't let the Kut-Ku bite you!

November 14, 2017

MH4U Eldaora's Taus Hunting Horn cosplay prop [part 6]

Hello wyverns and hunters!

Here comes the sixth part of my massive Monster Hunter cosplay build project – I'm making a Hunting Horn called Eldaora's Taus from Monster Hunter 4 Ultimate, one of my most played video games to date. I've been a big fan of the franchise ever since I played Freedom Unite and making a costume from the series has been a dream of mine for many years and now it's happening!
I am currently only making the weapon but I will make a complete armor set later to go with it, of course. I'm not doing naked runs. *insert Khezu screams here*
You have no idea what I've made before I got to this point in the progress? No worries, all the previous parts of this project can be found here: 1, 2, 3, 4, 5

Note: this project is split into several parts because otherwise it would turn into a kilometer post; I need to document my progress carefully (many photos etc) since it's a school project.

Let the quest begin!

Hunting Horn spray primed.
During my last progress I ended the post with the gluing episode incomplete and that's because I ran out of glue. My mom had bought new glue during a trip afterwards it was just an ordinary white wood glue but it did the job. I completed gluing the surface for protection and after that I finally got to the fun stuff – prepare for painting! 
Above you can see the start of my priming process. I used spray primer because it's quicker and easier when it comes to covering such a big object. Sadly it didn't take long before I ran out of my primer cans and had to go buy more. A lot more.

I was in a hurry to prime the whole thing during mid-October because the weather was unpredictable and the sky constantly looked like it might rain any minute, but according to the forecast it shouldn't. For once I didn't have shit luck and the weather stayed rain-free for the whole day that I was spraying. 
Note: I have to take some risks with the weather because I'm running out of time as soon as it gets cold outside I can't spray paint anymore and that would be a huge problem since I need to finish this project before Christmas. And yes, I live high up in the north so cold weather is guaranteed and often early...

Just a couple cans...
On the photo above all the cans inside the plastic bags were newly bought (and the one with the lid off) and the ones without plastic I had from previous projects. I'm hoping these will be enough. There's also of course the empty primer cans that are not pictured. On the photo there's silver spray paint, gray primer and glossy clear varnish for finishing.

I turned the Hunting Horn around and primed the other side as well. After that I took it back inside the garage to dry overnight.
The next morning I went back to the garage to take a look. Meanwhile I stared at my progress I started considering using worbla to make the eyes more three-dimensional by making "eyeballs" that I'd sink into the carved eye holes. Soon enough I made that idea happen and took out the heat gun and some worbla scrap pieces that I had saved in a plastic bag. For those not in the know worbla is a heat-activated thermoplastic widely used by costumers to create a wide variety of items.
I molded the worbla scraps first into a ball and then into a "caterpillar shape", once done I reheated the worbla and pressed it into the eye holes to let it cool down. Repeat for the other eye.

Eyes accented with worbla.
When I was done with both eyeballs I noticed that the eyes were in a different angle (it became even more obvious after attaching the eyeballs!) and it looked really stupid. That's when I figured that I could save my Horn from looking retarded if I redefined the "brow ridges" to be more similar to one another. I took some more worbla scraps, molded them together and made even longer caterpillars with my fingers and then pressed them in place. It was really hard to get both sides to be symmetrical and honestly, they aren't. But it's a lot better than before and the accented ridges gave the face more definition anyway, which looks cooler.

I couldn't be bothered to start sanding the worbla smoother since the rest of the surface isn't smooth anyway (I'm gonna make it look battle-worn!) and thus I went out to spray paint the whole shebang silver. Again the weather was moist and not ideal but at least it didn't rain this time either and I got done in time.

Silver spray paint in progress. First coat.
I did two coatings of silver spray paint and then carried the Horn back inside, into safety from the weather. It was during this point that I realized that I had forgotten to add the little outwards-facing pointy mane spike at the top of the "hair bananas" but, frankly, the more I thought about it the more I felt like omitting that small detail was the best choice anyway. It would surely break easily and, seeing how it would face a different direction than the rest of the manes, it would make it really hard (if not impossible) to rotate the thing around and I'd rather not make it even harder to handle and for future storage than what it will be already...
Honestly, I'm sort of dreading how I'm gonna maneuver this thing after I've attached the long horns because you don't want to know how many times I've already accidentally smacked this shit into doors, walls etc when turning/moving it while walking. xD

Eye area sprayed. The seam didn't transition as neatly as I hoped...
Once I had sprayed the first coat of silver paint I noticed how the worbla's seams above the ridge were a bit too noticeable. I asked stepdad if we had anything I could use to soften the transition and the options were silicone or acrylic sealant. I went with acrylic sealant because at least it was the safer choice when it came to painting it and it could be sanded as well.

Acrylic sealant added.
I dipped a finger in water and used it to slick over the acrylic and shape it how I wanted it to be. It has a long drying time so I did this before going to sleep and so it could dry over the night.

The following day it had cured and I sprayed it silver. It's not perfect but with the acrylic it looks better than without it. The acrylic stays a bit elastic even when dry and so I just pressed it down with my fingers to flatten it down and press the seams as minimal as I could.
On the next day (17th October) I started the detail painting, which meant painting with brushes by hand. I had bought a rustic red paint earlier but decided to try do the shadowing effects first with black paint – which in hindsight was a bad idea. The thing is that we had no normal black paint at home, only spray paint. I knew that for weathering and dry-brushing effects I would need ordinary paint but still decided to try with spray paint. I used a plastic bowl and sprayed a lot of spray paint in it, until I had enough for it to create a thin liquid, which I then quickly wiped off with a cloth. Just as I feared the spray paint was too intense in pigment and dried way too fast for me to be able to get the desired effect. I gave up on the shadowing/weathering for now and began the rust color painting episode instead.

Started hand-painting the rust red details
Unsuccessful black spray paint experimenting visible.
While painting I realized it would be hard as piss to get it symmetrical and so I just decided to free-hand the details instead and hope for the best; I kept my MH4U game open as a reference, even though I had to change or leave out some details because of how different my Horn is shaped when compared to the in-game model.
I used different painting techniques to get different effects and varying color intensity, although I will need to add more depth and shadows to the red with black paint later. It's a bit too flat right now and, to be honest, I'm not happy with the color because it's a bit too bright (it's more vibrant in real life than on photos) and I expected a more dull and brownish red, like shown on the lid...

Painting in progress. Why do I inflict this pain upon myself?
I of course always had to paint one side first, wait for it to dry, rotate it carefully and then paint the next side. Rinse and repeat.

Painting the backside...
I must admit that I'm not happy with how the body's "crosses" lined up on the backside. I knew that things would mess up considering how I can never see the whole Horn from all angles at once and thus I have to improvise as I go on, rotating it while I progress and then, if I notice that something's off or doesn't line up at the end when I meet up again at the starting spot, it's already way too late to do anything to try to fix what went wrong. So yeah, this thing hasn't even seen symmetry. xD

Once I was done painting the red, except for the head, it was time to move on to the weathering effect. I went to buy some ordinary black acrylic paint (art paint) and used a small brush and a cloth to wipe off all the excess paint, leaving only a small to moderate darkening effect as I went on. This was time-consuming and annoying at times.

Weathered upper head to the (watcher's) left,
untouched original color to the right.
The point of the black paint was to darken the overall appearance (since the rust red was too bright) as well as provide a weathering effect and make the whole build have more depth.
I dipped black paint into occasional uneven spots (holes etc) and when I wiped it off the paint stayed in the crevices and gave a cool worn look.

Darkening, darkening, darkening...
Many hours later I was done adding and wiping off black paint. The end result looks better now than without the black. I know that I could have done a better job with more color gradients and shadows etc but I don't have the time for it right now and, besides, almost all of the paints I've been using have been of different types (alkyd, acrylic, spray etc) and I don't want to try mixing different paint types while fresh because I have no idea how they would react to one another.

Black paint session complete, save for the head.
Alternative photo of the same progress as above but seen from another angle here.

Now the only things left was to finish up the horns and ears, attach them to the head and then paint the head and eyes – sounds easy when you say it like that, but on further thought I realized that I might need to change my plans a bit when it comes to how exactly I will attach the horns as some issues showed up; I want to make sure that they'll actually stay on and not break off from smaller impacts and thus I thought that I'll end this post here and make a final, seventh part, for finishing up this thing as I suspect the horns and ears process might get a bit longer than I initially thought. So yeah, I originally totally intended for this sixth part to be the final one sorry but I think I'll just make a seventh post to avoid this one turning super long since yeah, photos quickly make a post long and there will be some explaining... xD

Thanks for following my progress on this MonHun prop and keep your eyes peeled for the final part!

March 18, 2016

Hotaru's sword from Samurai Deeper Kyo!

Hi there everyone!

For a long time now I've wanted to cosplay Hotaru from Samurai Deeper Kyo and, as you may know, I've already got most of the cosplay done, yay! :D I think SDK is a pretty underrated series and even though I read it more than three years ago it's still one of my favorite shounen manga and the urge to cosplay from it hasn't withered away, which just further shows that I really enjoyed SDK and it left an impact on me. Some of my cosplay impulses come directly after I've finished a series but then they just die out in a couple months at best – but with SDK even after all these years I'm still super eager to finally get to start working on a cosplay from it! I just really enjoyed the story, all the characters, the art style...

This is the only official colored manga artwork that
I found that shows Hotaru's sword completely.
On 3rd September 2015 I started the making of the sword notice how long ago it is! I wrote on this post every time I did some progress during my "woodwork" class (aka 'redesign' and 'furniture renovation') in school, which I had approximately once per week, except during school breaks/vacations or when I was sick. Note: this is gonna be a rather lengthy post.

I was in my woodwork class in school and when I had to think up a project that I wanted to do Hotaru's sword quickly came into my mind. I saved some references on my cellphone, fetched a suitable plank from what school happened to have available, drafted the sword's shape onto the wood by using one of my unfinished other katana swords *coughmasamunecough* as a base. I left the sawing for next time as I didn't find the kind of saw in school that I had gotten used to and wanted to use; I went to borrow one from my stepdad on the Saturday that followed.

Back in class I cut out the sword from the plank; it didn't go quite as neatly as I had hoped. I hadn't used said saw in a couple years so I had forgotten how it was to use one of these. I didn't make any horrible mistakes but things just didn't end up as straight as I ideally would have wanted. I cut so gay! 
I took a file and started filing down the dagger end of the sword first. My arms were hurting so much after I was done sanding and filing for the day, hallelujah.
The next time I sanded and filed some more on the dagger and then I did the main blade part. Before I left class I put some filler putty on areas that had holes or cracks in them.

I apologize for the crummy cellphone-quality on most of the photos ahead; I didn't have my SLR camera with me in school during this project.

After I had started sanding the "dagger" side and put filler
on all the spots that needed it.
The next time I came to class I had a short panic moment – things had been moved to new places and I couldn't find my sword anywhere! For a moment I thought that someone might have thought that it was just a scrap plank and trashed it. D: Luckily I found it lying on the "coffee break table", lol. 
I started by sanding the filler putty smooth, wham! I then took a piece of plywood from the scrap pieces box. I drew the circular tsuba on it and two pieces the same size of the handle; I wanted to thicken the handle so that it wouldn't be the same thickness as the blades. I also wanted to thicken it for a better and more comfortable grip.
I sawed out the plywood pieces and glued one side of the handle pieces to the, well, handle. OH LORD THE SCHOOL'S GLUE BOTTLE. It's so stuck that I had to use all my force to squeeze minimal amounts out of it
– it was horrible lol. Took forever. ._. I swear it felt like over half of the glue had hardened inside the bottle...
Oh well, 10 minutes of glue squeezing later (and a red face and hurting hands) I had glued one side in place and put pressure clamps on. 

Glue added and pressure clamps on. Notice the tsuba on the table.
Next up I put some filler putty on the tsuba too; it had gotten a fair amount of "cracks" (aka the top layer of the plywood had peeled off while sawing) and I accidentally got a dent on the edge that had to be filled in too. I put plenty of putty on it and put it on a clamp to dry as well.

Tsuba put to dry after adding filler.
Next time I came to class I was horrified – everything had been moved again and a loooot of stuff was gone. I saw that my sword was lying on the table where I had left it but the tsuba and the other handle add-on piece were missing. My first instinct was to dig in the cardboard box on the table and in it I found a lot of sand paper and my handle piece. Thank God. I guess it helped that I had written my name on it before I left last time, otherwise someone might have thought that it was a random scrap piece... Now I just had to find the tsuba. I remembered that I had left it to dry on the clamp but when I cast a look at the clamp I noticed that it was open and nothing was in it. I went and asked the teacher if he had seen it and he thought that someone might have thought it was just a trash piece and thrown it away. We both started digging in the big box on the floor that was filled with scrap pieces of wood; we dug in it for several minutes before giving up. 
I looked around everywhere possible and didn't see a trace of the tsuba THE HORROR STRUCK ME. What is someone really had thought that it was just a random trash piece that no one used? D:
I went to ask this one older guy, who seems to be a "helper" but not an actual teacher. I got it implied that he was the one who had been moving stuff around and yeah, I described what my missing piece looked like to him. He looked at me for a few seconds and then his face did this kind of I-just-had-a-revelation-and-now-I-feel-guilty expression, as if he remembered seeing my tsuba and putting it in the most horrible of places. Yeah, probably there.

Guessed it?
Yep, dumpster diving time.

The trash hadn't been taken out and so we still had the hopes on our side or that's what he said. We probably spent like 10 minutes digging through all the trash bags before I finally hear a voice shout "hey you, boy, I found it!" and I look behind me and see this guy holding up my tsuba with a satisfied grin on his face and a trash can next to him. I thank him, he pulls some jokes and I go and sand down the filler areas with sand paper. After that I fetched the drill and made several holes in the middle; the rest of the class I spent carving, filing and sanding the tsuba hole so that I could thread it all the way down the blade, into place.

Tsuba with the hole fixed. I added some more putty to even out
some pressure marks from the clamp as well as cracks that appeared
while making the hole itself.
Oh, and I also sanded down the excess dried glue, on the handle, that had spread past its intended place. I then glued the second plywood piece on. It's not a problem to sand down dried glue with sandpaper!

This shows the glue spill from the first add-on handle piece before I sanded it down.
When both handle pieces were glued on and dry I took a file and started filing the corners of the handle, so that it would be more rounded and thus provide a more comfortable grip. I sanded them smooth after the rough file work.
 
Handle rounded (it barely shows on this photo) and testing tsuba fit.
After this I went home to buy the termoplastic holy grail of all cosplay prop makers – Worbla's Finest Art! Yes, now the time had finally come for me to try out this material that everyone has been gushing about for years! *u* It feels so good to finally get some studying money so that I can afford ordering Worbla from Germany...

Back at class I put gesso on the tsuba because I wanted to give it some extra base coatings; the rest was to be primed after I had done the worbla parts. So yeah, time to try out worbla for the first time ever! I must admit that I felt all kinds of "holy shit I hope this won't be hard" and a case of kuumotusta but yeah, once I had measured, drafted and cut out the pieces I needed I just turned on the power of my heat gun (borrowing from stepdad is da best!) and prayed to the cosplay gods that I wouldn't commit some disastrous nooblord maximus.

Worbla pieces added – success!
Thankfully this was a very simple and newbie-friendly first project for learning how to use worbla. I only had to wrap some approximately 2 cm wide strips around and blend in the seams. I didn't do any screw-ups and I'm quite satisfied with the results for being a first-time. :) After this first experience I already figured out a lot of how worbla works and now I'm even more excited to do some bigger projects!
Oh, and to blend in the seam/overlap so that it "disappeared" I thought for a while what to use and so I went to dig around the garage... and I found this little tool that proved to be mighty useful:

much clean. such wow.
It's for school use though, so what did you expect?
I used this metallic spatula thingy to make the seams (aka where the worbla overlaps with itself) flat, move and push the edges, flatten it out etc. It worked wonders!
Next I thought about ways to smoothen the worbla out; not like I mind the texture that much but I wanted to try to at least make it a little bit less noticeable. I took some really fine grit sand paper and sanded it carefully although I'm not sure if it actually made a difference...? Oh well.

Worbla gets a bit paler by sanding...?
Next up I went to buy some spray primer because heck yeah, why not? I would have preferred white but the store only had gray so that had to do. My school has discount prices to this one store so I get things a bit cheaper if I buy from there so, eh, who cares about the color in the end since it's just a primer? :DD I regret not knowing about the discount earlier because I bought paints from this store already last year...

Primer in a spray can!
I started painting my sword and, err, of course I'm not patient enough to do like a billion thin coats so I sprayed on a closer distance than recommended to get better coverage quicker. Am I the only one doing this all the time? I really shouldn't do this crap. Well, if anything I noticed that the excess paint was very easy to spread out with your fingers and it didn't leave any signs of where it had been before. Flawless blending, frick yeah! o/
I didn't get to finish priming though because out of nowhere I saw that a spot that had been just nice before now had the wooden grain sticking up. I just took the grain and ripped it off, added some filler putty and left it to dry. Damn you derp wood for prolonging this project now, why didn't you show yourself earlier? ._.
Oh, and guess what? The next day, when I had fixed that grain issue and continued spray priming, well, more surface derps showed themselves and I entered "fuck this shit"-mode and put filler all over the damn thing! I was really sick of having to constantly backtrack and delay my progress because uneven surfaces galore yeah, it happened many times during this project but I just didn't bother to mention it each and every time. It's annoying how much more noticeable those fuckers get once a coat of paint goes on; really sticks out like a sore thumb.

Filler added all over the place and put to dry. Priming incomplete.
(notice my mad balancing skills!)
So yeah, once more I had to pause the priming to put some filler putty to cover uneven/faulty areas. But because I put filler on both sides of the sword (except on the handle) at the same time I had to put it to dry in a way so that neither side was touching anything. This made me position the handle on a tip of a table and then put wooden blocks on it, to act as weights, so that the center of balance would change and fit my needs.
The next time I came to class the filler had of course dried so now I just had to sand it down. I was super careful to make sure that the filler blended into the wood so that it wouldn't be obvious, once the paint was on, where the filled in spots started and ended. But even though I triple-checked and everything there was still two small areas that I had missed when I once again resumed the priming work. Oh and guess what? I've almost used up the whole spray can just for this sword alone, goddammit! xD But yeah, those two misses were minor enough that I just drowned them in some extra coatings and then it was pretty okay, lol. I got lazy. I also noticed that putting filler putty on top of worbla (to even out bumps, overlaps etc) is a thing! :D

I had winter break and didn't get to work on my sword for a while. When I finally got back to school I had to go and buy some more silver spray paint because I noticed that my trusty can was pretty much empty, boo. Much to my dismay the brand I had been using had been changed and the newer replacement one, that the store now carried, seemed to be of a slightly darker shade. I thought that it couldn't be that different so I went ahead and bought it. Fuck me. :) Okay so, I started painting my sword as per usual, everything looked fine in the dim garage light when the paint had been freshly sprayed on. But guess what? When the paint had dried I noticed that it was way too dark and dull/matte to pass for a blade. FFFFFUUUUU--
Nothing to do than backtrack and go buy paint from another store and yeah, that totally means a store that doesn't give me the school discount price. Fuck my life. :) My other option was to pray that there happened to be any leftover spray paints at mom's from the days when I still lived there and did my early cosplay prop projects...

I found an almost empty can of silver paint at mom's which I took with me to school; I also took with me my own old silver spray paint just in case there was a little left (it sounded empty). All along I was praying that there would be enough spray left to allow me to be able to paint both blades on the sword. I started shaking the cans and first tried my luck with the seemingly-empty-one-from-home and there was enough left to cover one side of the dagger part. Ooooookay.
I stared at disbelief at the other can that I had picked up from mom's it barely felt like it contained much more than the one I had just used up. I pressed the nozzle down and........ nothing happened. It was as if the nozzle was stuck and wouldn't go down. Oh, great. ._.
I went and asked one of the teacher assistant guys and he proceeded to joke about sticking something sharp into the can again, to check if there was spray left, to which I responded "OH NO YOU DON'T" and then we both just laughed. In case someone doesn't know what I'm referring to then go and read about my foam explosion adventure here. x) But yeah, he totally did shove something sharp into the can and luckily nothing exploded this time – just a small burst of spray paint came out. :D But the problem was that the nozzle was still not working and yes, I had tried using all three nozzles from my other spray cans and neither of them worked on just this one can that I needed right now, urrgh.
I went to look around and found a spray can that belonged to someone else so yeah, because I'm a sneaky bastard I stole borrowed its nozzle and ermahglerb it worked! I was about to jump with joy because I could finally get to paint this damn thing!

The blades are painted silver, the rest is untouched since priming.
Much to my surprise the can I brought with me from mom's actually contained enough spray for me to be able to paint both blades completely and even, almost, do two full coatings. So yeah, there was actually enough spray left and I thank the Cosplay Gods™ for that.

I took with me the sword home after the spray painting – now the only thing left to do was to paint the non-blade parts (handle, tsuba, habaki) by hand. But as per usual I had a ridiculously hard time trying to find some red glossy and/or metallic paint that wasn't spray paint! I found this weird really chunky-looking paint called Inka Gold in the color Lava Red (fitting!) in the bookstore shop in town and, even though it felt a bit overpriced, I decided to try it. I couldn't find anything else (unless I bought online but that would mean stupidly high shipping costs) and I noticed that it was a German brand so yeah, I thought that at least it can't be shitty because German stuff tends to be good quality.

Painting preparations done. The plastic spoon's other end
I used as a spatula, if anyone wonders what the heck it was for. :'D
Turns out that the super chunky paint is actually a water based metallic vax paste that you rub on by using either a sponge or a soft cloth! Fancy shit. I tore a piece of fabric from a worn-out bedsheet because I didn't have any sponges and yeah, it worked just fine. I had to use one of my stiff makeup brushes (lol but seriously, I had nothing else that would work) to paint some spots that needed pin-point precision or were impossible to reach with the clumsy crumpled fabric.
Good thing with the vax paint is that it dries really fast and that, because of its thickness, it will easily cover up flaws and uneven spots! The bad thing is that I noticed that, even after it has dried, that if I touched the painted areas the paint would rub off slightly and leave fingerprints. So yeah, now I needed to get something to seal it with too. Great.


Because I didn't have any sealer nor varnish at home I had to go fetch some as well. I first thought about seeing if the bookstore carried the specific varnish for the Inka Gold paints but they didn't so yeah, I had to get something else. I found some all-purpose glossy varnish in another store called Tokmanni (it's a mix-store selling dry foods, sodas, toys, clothes, power tools etc) that I decided to try. I've actually never used varnish before so yeah, I guess it's high time to start eh?

Glossy varnish that I used.
The varnish did the trick, wohoo! o/ Now I only needed to wrap the handle and I can finally call this project complete!
I had bought 1 meter of red fabric bias tape during early March 2016 and, luckily, it was just enough if I wrapped it a certain way. But when I was about to start wrapping the handle, with some help by Sacchan, I noticed that the trusty glue I've had since at least 2012 had dried out. :'( Damn it. So yeah, with no Karlssons klister to save me (that's the name of the glue) I had to go and ask to borrow stepdad's hot glue gun instead – which I got!
Sacchan came and visited again a few days later and we did some teamwork because I needed an extra set of hands for the gluing mission. We basically did it so that I was the one carefully wrapping the bias tape (had to wrap very specifically for it to be long enough) and giving Sacchan directions on where to apply the hot glue, little at a time. So yeah, I was the wrap master and she was the glue master. xD It took us a while to finish but at least it worked out well and nothing went wrong ~

Finished SDK Hotaru sword!
Sorry about the crummy final mirror photo, it doesn't really do it justice. :'c The tsuba and the habaki parts have a metallic shine but it just doesn't want to photograph well, lol. My sword also ends up looking overly neon red on some other test photos that I took after finishing it, ugh. I hope it will behave on cosplay photoshoots and con photos etc; it's not really flattering when it ends up looking way brighter than it actually is...

I can admit though that I'm not completely 100% satisfied with this sword. I did some early parts of it a bit too hastily (sanding and spray painting, mainly) and because of that it's not as neat as most of my other props – it's things that doesn't really show from a distance but I can easily spot them with my naked eye but, then again, I know where to look. *shrugs* Also, because of being impatient or non-observant I several times had to backtrack and add filler or sand something smoother etc; it was really annoying to have to go back and patch up stuff you either lazied out on (because you thought it was ready but it actually wasn't) or somehow missed. It sucks to have to sand down imperfections after you've already primed and started doing the final painting on something because you didn't notice them during the original sanding process... ughrrr. >_>

Note: I finished this sword and Rentarou's gun at the same time, but I decided to publish the gun post first even though this Hotaru post should, chronologically, have been published first. This is the reason why I in this post, for example, mention going to buy varnish even though in the gun post posted before this one I suddenly had varnish already (because I had already bought it while this post was still an unpublished draft). xD I'm mentioning this just to clear up any eventual confusion! Oh and yeah, Hotaru's sword was the first cosplay prop I used both worbla as well as varnish for.

Thanks for reading! Hotaru wig and makeup tests coming later!