Woof and hello~
For Nekocon earlier this year I made a new cosplay, my first Digimon gijinka Gaogamon. I didn't have time to do a WIP post before leaving home so I figured I'll just post it now that the summer con schedule is over!
So, uhh, this is a cosplay that I will improve later on and what I wore at Nekocon is basically the beta version lol. I was short on time when I made all the furry parts (as always :D) and a lot of the clothes are reused from my other cosplays and stuff I already have at home. The new parts are the "furry ones" that help with recognition – the ears, tail and mane.
I started with checking the local fabric store for light blue faux fur but of course there wasn't any available. Or well, there was one with an okay color but it had completely wrong type of pile! It sucks so much that there used to be an Eurokangas in Tornio and Kemi used to have, I think, two different fabric stores but they're all gone now and the only store left is Kangaskukkula in Tornio (and Kangastalo, but that's like almost entirely upholstery and home decor fabrics so it's not so good for sewing clothes). So yeah, finding the right fabrics for cosplay is extremely hard up here unless you're willing to mess around with ordering online or trying your luck at thrifting... or taking the train to Oulu for the nearest Eurokangas. And still I'd consider myself very lucky because mom has tons of fabrics in the attic from back when she had her own fabric store, but even with the "fabric store at home" option I still quite often have to go elsewhere to buy what I need.
So yeah, Kangaskukkula didn't have what I needed for the mane and so I decided to check out Kangastalo just to turn every stone around. They had a few faux furs, surprisingly enough, but mainly black and dark colors. I was feeling increasingly desperate and even considered buying some fluffy pillow covers from there to cut apart, color and piece together but I realized it would become quite expensive because one cover was like 16€ or something and it wasn't very big so I would have to buy multiple. With all fabric store options exhausted I suddenly had an eureka moment – why don't I just buy a sheepskin from Ikea and dye it? It's natural wool and thus, technically, any common fabric dyes I can find should work on it – and it would be cheaper than destroying tons of fluffy fancy decor pillows!
I felt lowkey crazy for even cooking up this idea but it was quite literally the best option I had and so I went over to the local Ikea and walked out with an ULLERSLEV sheepskin (which costs 349 SEK). I tried to pick one that was as uniform and light in color as possible and also with longer pile length and density; there's always some variation in each individual pelt and so I took my time picking a good one for my project.
Once I got home I took an old brush and started combing the fur to mark where I'd cut. You can part the wool anywhere and so it's actually very convenient to work with. I was also surprised how easy it was to cut through the leather on the underside! I made sure not to pull or tug the wool and brushed it out gently to get it to lay in the direction I wanted. One of the reasons why I parted it was to make it easier to visualize where to cut (pins get hidden in the fluff lol) and, of course, to preserve as many individual hairs as possible.
 |
| Parted and sectioned out the fur where I'd cut it. |
I cut out one larger part for the front and one smaller for the back. I utilized the natural shape of the leather to minimize waste. My front and back pieces are not identical in shape, nor are they symmetrical anyway. I don't mind that and it's honestly not really that noticeable because of the floofiness.
With my pieces cut out (and over half of the sheepskin left for future projects – money worth indeed) I had to dye them. Fun fact: I've never dyed anything before. Needless to say I was extremely anxious about completely fucking up this part!I've kinda avoided having to dye something because I've been so scared of failure lol. I had bought some Nitor allfärg/yleisväri (number 16 for those wondering) in Tokmanni earlier.
With my pieces cut out (and over half of the sheepskin left for future projects – money worth indeed) I had to dye them. Fun fact: I've never dyed anything before. Needless to say I was extremely anxious about completely fucking up this part!
 |
| There's no turning back now. #ihavenoideawhatimdoing |
I did read the instructions but I figured I couldn't exactly go throw in my dyes into the shared washroom's machine and then some unfortunate neighbor's clothes turn blue lmao. The other option seemed hella inconvenient too because I'd have to boil water and stir it while warming it up and it's not like I own a big enough skillet to dunk my furs in (and the instructions said it needs to be at least 7 liters lol) and just ugh, it seemed way too complicated and made my neurospicy brain spin. So what do I do? I disregard all the instructions and yolo it, of course! xD
 |
| Omg it's actually taking on the color! |
So I went to my bathroom and covered the shower area with newspapers and threw my two fur pieces into the largest bucket I had. I filled it with hot water from the shower, put in a bit of dyeing powder and held my breath. I had no idea how much dye I was supposed to use because it was a marine blue and I wanted a very light blue shade! I was really worried of it turning too dark (both blue shades available were really dark) and so I was super careful with the dye lol, especially because I didn't have any test pieces.
 |
| The leather took on the dye so well, the heck?? xD |
I don't remember how long I kept the pieces submerged but it was a pretty long time, at least 30 minutes?
I also find it quite interesting how well the leather dyed, especially because the packaging doesn't mention leather at all, just natural fibers like cotton, silk etc. I mean yeah it says "and other materials from the animal and plant kingdom" but I've always had the impression that to dye leather you need specific products meant for just leather. :'D Well, I don't complain, this was a cool learning experiment!
 |
| Dyed pieces laid out to dry on my shower curtain rack. |
It took quite long to dry (a hairdryer would have been nice..) but while they dried I had time to work on the other parts so it's not like I sat and rolled my thumbs
Once the pieces finally were thoroughly dry I took out the comb again and combed them out. With natural wool you can alter the texture of the wool by combing it! This is actually pretty neat because you can so easily change the look and touch of it to fit your needs and if you want to revert it you can just get the wool wet and it will go back to the original texture. I tested this because I had actually combed the pieces smooth before I dyed them. :)
 |
| Natural wool texture to the left, combed to the right. |
Gaogamon has these two tufts or tassels or whatever hanging from its mane in the front and I had to come up with how to make them with supplies I already had at home. My last minute solution was to try to dye some white synthetic wefts with markers. I've had some wefts lying around for like, uhh, 15 years? xD
I realized that I have a ridiculously pathetic collection of markers for being an artist – I quite literally only have two blue markers. Heresy! And the other one is way too dark for this project. So yeah, I only had one option
 |
| White ancient wefts and my one and only light blue marker lmao. |
I went through the fibers with the marker and colored them in. It feels cheap but it works! Synthetic wig fibers absorb the ink from markers and the dye "stains them"... or something like that. Whatever the technicalities are behind the process it works. I didn't use any rubbing alcohol or anything else than just the marker, I don't know if there's different needs for different brands or methods or whatnot but I did a water test to check for color bleeding and it didn't bleed at all! I put the dyed fibers under running tap water and rubbed it against some paper and nope, perfect results. Maybe it depends on the wig fiber quality too but I literally used some Tradera (Swedish equivalent of eBay) random hair fashion shop wefts from a decade ago that are of unknown quality and it worked lol.
 |
| No color bleed whatsoever. Yes, I was surprised. |
In case anyone's curious what marker brand I used it's Letraset's promarkers of the comic art set so yeah, basically markers for doing manga and comics.
While I like the shade of blue I ended up with by itself I don't like how it's clearly a different shade from the wool, but it had to do for now. Ideally I would have wanted the same shade and I did try to look for light blue yarn before I settled on using the weft but yeah, I couldn't find the right light blue yarn. I also considered needle felting the tufts from the same wool but I didn't have enough loose wool nor the tools to do it. The last time I did felting was like 20 years ago too. :'D
Oh well, back to the weft I had to roll with for now – it was too long and I needed to split it into two pieces. I cut it in half and then cut the length in half too. This was such a messy ordeal and hell to work on. I needed to make wefts out of the loose fibers and I used some kind of universal glue for this (didn't have UHU glue available) and it dried way too slowly! It felt like it took forever to dry, despite claiming to be quick-drying, and a lot of fibers came loose and went everywhere and then I had to discard them, which was really stressful because the weft was rather sparse to begin with and I had no Plan B. Without exaggerating I probably lost half of the total fibers due to the glue being crap and the fibers getting stuck on my sweaty-ass hands when I just tried to manage them.
 |
| This was supposed to be easy but it was hell. |
I eventually managed to add the glued self-made wefts onto the original weft rows to get double thickness. Gaogamon has these gold-colored bead thingies hanging from the tufts but at this point I had no time to check stores for suitable beads and so I did a temporary easy-peasy solution and used some golden steel wire that I just wrapped around the wefts until it was snug and stayed in place. I handsewed the wefts to the wool piece – the wool is actually so dense that I didn't even have to sew through the leather to get them secured in place lol!
To make the mane wool piece wearable I made it an over-the-shoulder thing so there's a strap on each shoulder running front to back. It's very simple
 |
| Handsewed the leather straps onto the wool piece. The thimble was goated. |
With the mane accessory done for now I only needed to do the ears and the tail. I originally wanted to use a fluffy fabric for these but of course the fabric store didn't have the right colors and I don't own an airbrush or anything fancy like that so yeah, I resorted to using what I already had at home – which meant a leftover piece of dark blue fleece fabric. I had bought a cheap fleece blanket from a second-hand store earlier that I used for the white parts.
The ears were straight-forward to make, I just measured and cut out triangles of the fleece fabric and then the inner ear parts of white fleece and sewed them together, after painting on the details.
The tail came with a headache because the more I thought about it the more I realized I had no idea how to make a curled dog tail – I mean, I don't really have any fursuit experience and the previous tails I've done have been much simpler than this (basically more or less tapering tubes lol). Not to mention that this was like the day before the day I had to depart for the con or something like that so yeah, the con crunch was too real. xD I realized I didn't really have time to start drafting impromptu patterns that might not even work and so I scoured the internet in my desperation for any kind of advice. Somehow all the stars aligned and I came across the perfect salvation for my urgency, namely a free pattern online that I could just print out in its actual size. Hallelujah!
 |
| Tail pattern by Pseudocanid. You can find it here. |
This pattern was such a blessing, it was very simple to make and easy to follow. Of course it would have been even cooler with a tighter curl but I really couldn't afford to be nitpicky at this point and I'm so relieved I managed to make a tail in time, lol.
 |
| Tail and ear parts cut out. |
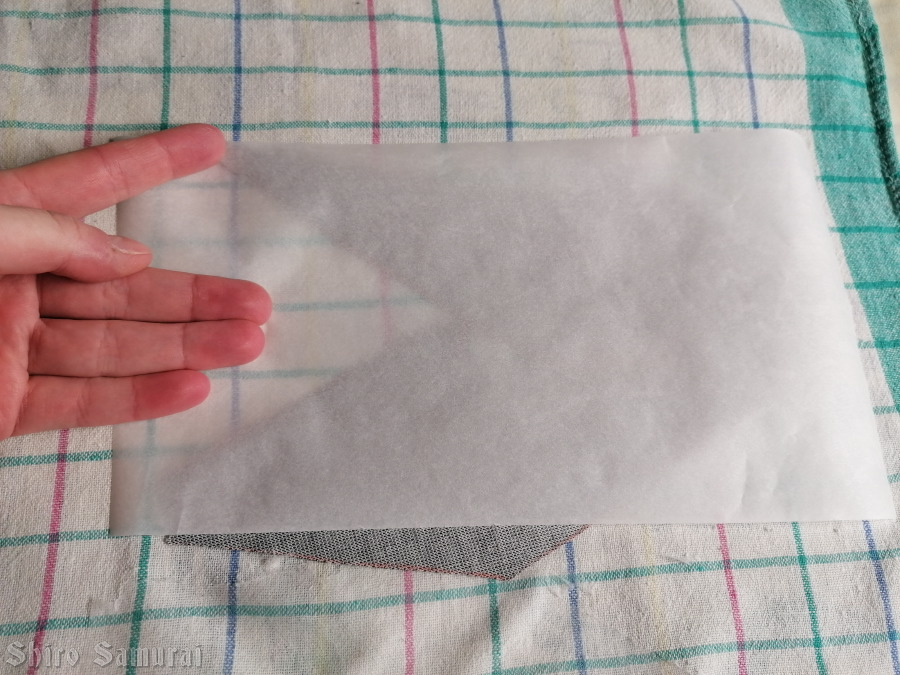
Gaogamon's ears have these light blue/white tips
 |
| Fabric paint testing on fleece. |
While doing the painting test I did originally mix in some blue acrylic paint to see how it would behave but I felt like there was hardly any color difference, for some reason, and so I ended up just using white alone because it didn't dry opaque anyway. If anything I'm a bit surprised that the fabric paint didn't dry and leave a crusty surface that would crack and/or flake. Or well, maybe it would crack if I start bending it and had a thicker layer on but yeah, with ears I don't really have to worry about any stress points on the fabric.
 |
| Sewing the tail pieces together. |
The tail I assembled with the sewing machine. Thankfully the patterns lined up just right despite my worries that something would go wrong. I filled the tail with cotton batting and soft fabric scraps, just like I did with the ears as well.
 |
| Tail and ears stuffed. |
I was a bit unsure about how to do the base of the tail, aka the part that is against your back. The instructions didn't mention this part and all my previous tails haven't had a rounded base like this. I ended up using the same off-white fleece fabric to make the "lid" and I handsewed a couple elastic loops on it to thread a belt or such through. I couldn't have known at this time but in hindsight I probably should have used something rigid (foam maybe? idk) instead. I didn't catch the issue that this created in time to fix it because I couldn't test wear the tail while at mom's because the rest of the costume was in my own apartment lol. So there were two issues and issue one was that I had made the loops way too big, which made the tail hang and not rest against my back at all. This I tried to fix by making the loops tighter while sitting in the car. Unfortunately this didn't really fix the main problem, just make it a bit less unsightly. The tail was still rather low-hanging and unstable and I think that's because the fleece of the base is too soft and yeah, it gives in too much when the tail is worn aka hanging (aka something pulling on the base fabric, making it stretch), making the tail droop because of a lack of support. I will have to come up with some solution for the next time I wear this costume but it was at least wearable at Nekocon. Twisted around a few times and needed extra safety pins for stabilization but hey, I had a tail at least. :')
Oh, the ears are directly sewn into the wig with a few stitches by hand but my first attempt had me positioning them in a way that seemed okay when not worn but, when worn, it looked so bad I legit cringed when I looked in the mirror. xD It looked like some poorly drawn Sonic OC with horizontal flag pole ears lmao. Needless to say I removed the ears and reattached them on a different spot on the wig. I had to do an "anchor stitch" to lift the ears up (basically a single stitch on the backside of each ear towards the crown of the wig) to get them to look more action-y instead of sad, I mean Gaogamon has attitude and is supposed to look like a fighter, not like the Sorry-oo dog from Moomin!
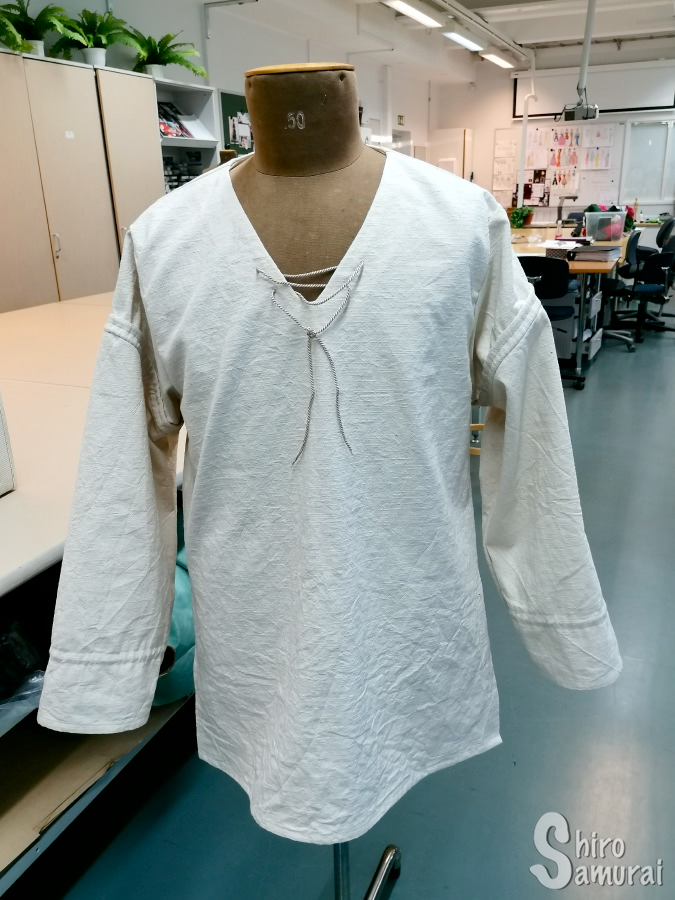
I have like two photos of this costume and the tail isn't visible on any of them but at least you can see how the mane and ears ended up.
 |
| Gaogamon gijinka v1.0. (photo: Firith) |
As I mentioned in the beginning I consider this an early version of this particular costume, meaning I will definitely improve it later; I already know what I'd like to fix and add before the next outing. :D
This was a pretty fun costume to wear although there's a lot of moving pieces and so I had to constantly readjust something lol. I'm sufficiently happy with it for now but yeah, looking forward to fine-tuning Gaogamon over the years because I do have a vision for it!
Thanks for reading!
Shiro Samurai out.
Shiro Samurai out.


.png)
.png)
.png)
.png)