Showing posts with label kimono. Show all posts

June 1, 2012

How I made a fake kimono collar

 Sup everyone!

When you can't be bothered (or have a lack of time) to make a full kimono just to have only the collar showing around the neck... then you figure out a way to fake the collar. I did and here's how:

Note! This is not authentic in any way, just for cosplay purposes!

I had very pale blue leftover fabric from the time when I had made Ukitake's yukata that I figured would work for Ichito's innermost kimono.. or well, probably juban in that case. I cut out a semi-long 14 cm wide piece that I thought would work for my plan. Then I went and zigzaged around it and ironed it so that I would get a nice middle fold.

After being zigzaged and ironed
After that I went and got some interfacing fabric to stiffen it. I didn't bother to cover the full length, only used enough to cover most of the middle part, meaning the part that will be closest to my neck. You can skip this but it makes the collar sit nicer and not be as floppy.

Ironing on interfacing
After that I took the fake collar, folded it in middle and folded inside the edges and started to sew it closed.

After sewing
Close-up
The interfacing helps it keep forms such as this...
When that was done I had to find a way to attach it. I didn't want to sew it on the dark blue kimono's collar (which I haven't started sewing yet) because I'm not fond of  how the fake collar would have gone all the way down instead of ending where it should.. like for example on those bad cheap mass produced Bleach cosplays.

(photo from Google)
So I definitely didn't want it to look like that because it screams fake to me. I wanted to do the illusion of actually having another kimono layer underneath and not just an obvious add-on collar.
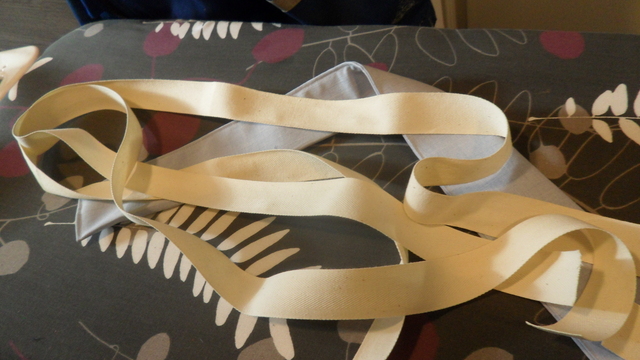
After thinking for a while I figured I could try using some wrap-around tie fastening method and see if it worked as well in real life as it did in my head. I went and got some wide cotton ribbon.

After I had cut out two same length pieces of the ribbon (no, it's not that yellow IRL)
I used around 130 cm long pieces. You can use longer or shorter if you want, personal preference. I wanted long ones so I could wrap them in my back and back to the front again for extra hold.

Then I just zigzaged the ends of the ribbons and sewed them on close to the ends of the collar. It makes life a lot easier if you wrap the collar around your neck and keep it folded the way you want it to be when you wear it with the final product, this way you can easier see where you will need to sew on the ties. I had to redo the ties twice before I got them placed right. I had to make sure to wear my collar reversed instead of left over right because Ichito wears his kimono like a dead person would... and that's because while he is not dead himself he's an immortal spirit, who lacks a physical body of his own because of a curse, so he needs to kill someone in order to have a body he can use...

Ties attached
And now some "how it works" photo. Please don't mind that I used a purple kimono as a substitute, I have yet to start sewing the dark blue one...

With kimono on over it (feels so weird to wear it right over left...)
Front without a kimono.. it's just tied over my chest
Seen from back
I guess that's it for today. Tomorrow I'll continue sewing on the blue kimono.. or at least that's the plan.

See ya!

Finally fabric for Okita's yukata!

 Hi!

Mom had promised earlier that we would visit neighbor town Kemi's fabric store on Friday or Saturday so today after she had finished work we went there.. in hope we'd find a suitable fabric for Souji Okita's yukata. I had earlier checked all three fabric stores in my town (well, there's four actually but I didn't bother to check the fourth because they only have curtain fabric etc) and none of them had what I wanted. That particular pale violet is so hard to find... always too dark.
So when we got to that fabric store we went around, checked all fabrics and it started to look dark... until I passed one of these metallic stands with like three baskets with random last meters of fabric from sold-out bolts. I believe. I saw that behind some darker fabrics there was something that looked like it could work. I pulled it out from the basket and mom started to 'finger measure' approximately how many meters it was. She measured it to about 2,5 meters and for a moment we thought if it would be enough.. think so. But then came the other problem: it isn't so thick and probably won't fall as prettily as my other kimonos and I might have to line it... even though yukatas are always unlined originally.
Oh well, I figured it would probably be the best find I could manage in this short time frame (under one week to make the yukata + Ichito cosplay) so we bought it. It cost around 12 € and was actually closer to 2,8 meters. Yay.

Fabric and... red... drink..
Before we went home mom got a sudden "Let's go to Kemi's Lidl before we go home!" whim when it appeared in front of us and I was all "lol, okay sure". We normally pretty much never go to Lidl nowadays.. used to go quite a bit many years ago though.
When we were walking by that milk and juice part of the store I looked up and almost stopped. I saw this very red blood orange juice that screamed ochimizu to me... so I looked at mom and went "mom I need that juice for a cosplay. I need to put it in my glass bottle and take it to the con... yes, the con next weekend..". She probably thought for a second "the fuck" even though I had already mentioned looking for some kind of red liquid for a costume... oh well, she said I could use it as my 'train drink' too so she bought it. Rasetsu-time in the train trololo... ~ For a moment I loved Lidl. x'D

That's all, bye!

May 19, 2012

Kemi's comic day

 Sup all.

So I attended Kemi's Comic day today, it's a small event for, well, comics. Today there was the 4-hour 'manga part' of the event. I live close to Kemi so I went there; I didn't bother to put on cosplay so I just put on my blue wool kimono ensemble and my Saitou wig instead. I'm glad I didn't because there probably wasn't much more than 5 cosplayers...
I met some few people I recognized, or well, they recognized me, lol. I hung around with Ellu and we had a blast, Moomin lemonade and derpin' goes a long way! :D

But there was a rather... err... unpleasant experience. Warning for angry rant and foul words. Let's say a few people had major problems trying to guess my gender (I KNOW I LOOK ANDROGYNOUS, OKAY?) and it, well, their inappropriate touching went waaaaay over my comfort zone. >_> I was too shocked to instantly say stop but I sure felt offended because, hey, where's your fucking manners!?!  (╬⓪益⓪)
I didn't give an answer because I was annoyed beyond words, but at least they eventually stopped. But still... don't fucking go touching my chest and whatnot for like 5 minutes that's plain rude and offending and, even more so, when you don't even apologize!! Fucking scum of mankind, I hope you burn in hell. ╭∩╮(⊙▂⊙╬)╭∩╮

Oh well, despite that one dipshit it was a nice experience; nothing more to say really. Sorry for the lack of photos.

Bye.

April 15, 2012

Finishing Ichito's "jacket"

 Hiya!

So today I finished Ichito's "jacket" hitatare? chihaya? I don't know thingy.
First off I attached the sleeves to the body and then I just hemmed everything. I left the sleeves open on both sides and the body of the garment is fully open at the sides too.

Sleeves are on.
Huge sleeves...
After hemming everything I just had left to do those chest cord decoration thingies... so here's how I made them:

Draw the shape.
 First off I went to our outside storage and cut off a tiny square of this one leather-ish plum colored fabric. Then I took a reference and drew the shape of those flame/flower/whatever decorations and cut them out.

Sew them to the ribbons... (notice sewing machine left fugly marks on them -.-)
... and then sew them to the collar of the "jacket".
And then it was finished. Now I can just tie them whenever wearing it. Although I could have made those ribbons a bit longer mom pointed out, oh well.

Ah, lovely thing ~
Now I have left to do the obi, "flap" with higanbana design, dark blue kimono, tekkou, bracelet, tattsuke hakama-ish pants, feet wrappings, shoes, eyepatch... err... let's just say everything else. OTL

Bye bye!

April 13, 2012

Ichito sleeve progress pt.2

Alrighty everyone, I did the second sleeve today. Here's the breakdown!

Preparations for marking every buttonhole...
Close-up of the marking process. Dots.
After that I started to sew the buttonholes. Again. I had to install the memory thingy myself this time, it worked after some errors...

... and then I got one like this. It doesn't look anything like a buttonhole man. -.-
I kept doing them anyway and when I had finished a little bit more than half the sleeve...

.. I finally got the first perfect one. Finally.
But that joy didn't last long because of course directly after that perfect one...

IT MADE NOT ONE BUT THREE MEGA DERP BUTTONHOLES FFFFFFFF-
Okay, machines will never work like you want them do. For every job well done they will pay you back with three times shit. Don't trust them.

Problem?
I promise, it trolled me.
But that wasn't the end of the trolling... because it seems three derpholes wasn't enough....

FFFFFFFFFFFFOOUUURRRRRRRRRRRR!!!1 Need I say more?
But when I had almost finished the sleeve something impossible happened...

It suddenly did two perfect buttonholes. What the fuck.
Wow, this thing sure can't decide if it wants to be my friend or not... OTL
Oh well, 43 buttonholes later and some raging I made the slits and threaded ribbon through them, just like I did for the other sleeve yesterday night.

Ah, it's handy to have the whole roll.
And well, then I just tied and burned the ribbon ends and it was done. Here's one in-progress pic:

Not sure if gusta.
The sleeves aren't attached and stuff needs to be hemmed and, err... lots of stuff left. But I'll finish this sucker! 8D

That's all for this time, laterz!

April 12, 2012

Ichito sleeve progress pt.1

Ah, lovely. I actually did some cosplay progress today, go me!

So, well.. here's some explanations and photos of what I did today. Sorry in advance for the crappy lighting, it was late... err, it still is but whatever.

 Okay, so first off I had to figure out a lot of things and mom helped me count how many "full patterns" (read: every different "ribbon loop" before it started over again) I could fit into the sleeve and stuff... I suck at maths, big time. Then I had to decide how close to the arm opening I wanted the ribbon to run, how big I wanted the buttonholes to be and how long I wanted the "long part" and the "short part" of the ribbon to be and how-- ... screw it, my explanations make no sense anyway so I'll proceed to show pics instead. xD

Ah, mass producing buttonholes.
Mom helped me to check how the memory function on this black sewing machine worked and after I found this machine part explanation after some googling because we couldn't find the manual we got it to work. Yay. She then set the memory function to make same sized buttonholes and then showed me how to sew a few and then I took over.

Buttonholes, buttonholes, buttonholes... Did I say buttonholes?
After what felt like forever my huge-ass-sleeve was filled with buttonholes. Yay. Some of them ended up being mildly derpy when others were perfect. Hah, machines won't do perfect work all the time...

Poor innocent fabric gets cut...
After that I snipped off all the loose threads and began to make slits into the buttonholes so they became... well... buttonholes. Only I wouldn't be using them for buttons.

Ah, lovely blue ribbon. Now it looks better.
 After all the slits were done I just took that blue ribbon and threaded it through the sleeve, making sure it was loose enough to not bunch up. Then I just burned the ends and tied them together and then finito.

Tomorrow the other sleeve will receive the same treatment run sleeve run! and hopefully I'll get some better photos of the thing and maybe I'll even have time to attach the sleeves to the jacket-thingy-whatever-it-is (it looks a bit like a hitatare or chihaya I think...) but before that.. *yawns*

.. I'm off to bed. Night.

March 31, 2012

Started working on Ichito

Pfhah. 

I Finally stopped procrastinating working on cosplays and actually did something.
Oh sweet, I have the whole April, May and beginning of June to fart out an Okita and Ichito cosplay from scratch.. here goes!
I decided to tackle Ichito first because he is the more complicated of them two and will take longer to make. Surprisingly when I showed mom a picture of him she went "oh god that's SO PRETTY!!". You know, I was pretty sure she'd kill me because it was yet another kimono wearing character.. but nope, she didn't.

Okay, so to my joy we already had 3 meters of white fabric lying around in the house that I could use for his "kimono jacket". It rocks to have a mom who used to own her own fabric store and be a former sewer... that means we have an outside storage full of leftover fabric and more sewing supplies than I can use up in my whole lifetime. XD Love you mom. lol

So, this is what I'm trying to make:


The game he is from is very unknown and err, I don't have many references to go by. But I'll find solutions to everything~

And well, this is my new friend, say hello to mom's overlocking machine!

Saumuri on hyvää puuta~
I've never used one of these things before and I was scared to use it at first but gosh, this thing makes sewing so much easier! It cuts of excess fabric automatically and it makes the seams look professional and stuff. I'll need to use it more in the future.

So, regarding the costume... me and mum cut out the pieces for his "jacket" today and it's starting to look as it should, but I still need to fold in the hems or what you call them, the edges. The collar is attached but the sleeves are not. No decorations are done yet and his flap thingy we haven't cut out. I'm sorry but I don't really have any progress pictures more than one shot of the sleeve.

Wide sleeve is wide.
Sorry not so much more to say, hopefully more progress photos next time!

March 20, 2012

Hajime Saitou derp.. err, I mean update


ARGHJGGJHGDFJHS SAITOU WIG I WANT YOU SO BAD, Y U NO HERE YET?
 Eh, sorry about that. Great way to start a blog post neh?

Well, anyway... home again from school early and a ridiculous desire to try on my vintage kimonos that I ordered from eBay some time ago. What I do? Put them on.
It seems they both would work for my Saitou cosplay, but I think I'll go with the tsumugi black one. I don't have the wig yet (like you noticed...) and I still have the shinsengumi haori left to make.. but I tried what I had on anyway, just to get an idea of how it will look when finished and if there is anything I need to fix. 
WARNING FOR A TRAUMATIC EXPERIENCE BELOW.

Oh god ain't I pretty? lolnope.
Eww mirror shots. Do not like. But there aren't other options to take full-body pics when home alone...
Yes, I censored my head with a meme face because it was derpin' herpin'.
Ignore the weird pose and the walrus that is me. I put everything on very quickly and so it looks like crap. :'D Oh, and yes, if anyone noticed I didn't take off the basting threads.. too lazy.
I noticed I will probably need to get myself a new white juban for this because the sleeves are too big on my current one and they bunch up and won't behave and just generally looked fugly. Oh, and the black kimono's sleeves are kinda short on me and they look extra short on this shot because I'm holding my hands awkwardly, but it's hard to find a perfect match vintage kimono... *shrugs* And there's no kitsuke police at conventions anyway.
I'm surprised my random long cotton sash thingy held up both my (metallic) swords... but I guess it will loosen when I walk around a whole day at the con and well, I won't use these swords for the cosplay anyway. And if anyone have missed it Saitou is one of my coming Närcon cosplays for this year.

Nothing more to say, see ya.