Note! This is not authentic but it looks okay for cosplay purposes! (also the sleeves are male style)
I'm tired so I will not explain every single thing I did, pictures will have to do for most of the how-to's today. Oh, and the first two photos were taken a few days ago and I have no pictures of the first cut out fabric step, not like there was anything to show because it was just rectangles anyway...
 |
| Panel cut out and ironed in the middle (shoulder part) |
 |
| Sketching neckline cut ideas on fabric |
 |
| Neckline cut out... |
 |
| ... and also backside sewn together |
 |
| Ironed shoulder part again to make life easier before attaching sleeves |
 |
| Pinning sleeves in place (ironed sleeves too and aligned shoulder and middle seam folds) |
 |
| Sleeves attached, testing it on |
 |
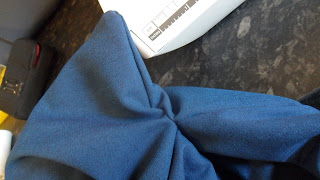
| ALL MY HATE TO SEWING ARMPITS CLOSED. ALL MY HATE ... |
 |
| ... and this is why. FFFFFFUUUUU Mega wrinkle derpherp durr (had to redo it three times before it was not-that-bad) |
 |
| Armpit sewing, third and final try (still wrinkle-ish on right side but didn't bother to fix it...) |
 |
| Sleeve 'bottoms' and side seams closed |
 |
| Folding in and pinning sleeve openings |
 |
| Sewing sleeve hems... |
 |
| Looked like this. Need to fold in sleeve opening once more... |
 |
| Finished sleeve opening |
 |
| Spread out kimono panels and took a look... what is this I don't even |
 |
| Cut the shit straight |
 |
| Cut out okumi panels (used double fabric) and ironed them |
 |
| Ironed side seams and back seam open (looks better!) |
 |
| Attached okumi panels |
 |
| Cut out and ironed collar pieces |
 |
| Sewed collar pieces together at one end to get one long piece |
 |
| Zigzaged okumi panel ends before attaching collar (collar also zigzaged around the edges) |
 |
| Pinning collar in place before sewing it on |
 |
| Folded in end of collar and okumi panel and hemmed them |
 |
| Finished kimono, trying it on |
 |
| Showing sleeves |
 |
| Kimono laid flat on my bed |
That's it for today and tomorrow my plan is to make Okita's yukata from start to finish afdghsah.

oi se näyttää tosi kivalta! 8DD
ReplyDelete