June 6, 2012

Okita's yukata finished!

So I woke up early today to finish sewing Okita's yukata. After lots of ffffffuuuuuu moments, rage and more rage I managed to get it done. I hate lining forevermore with a passion, it will always fuck up somewhere and then everything fucks up and it's slippery and pain in the ass to sew and just GRAH KILL IT WITH FIREEEEEEEEEEEEEEEEEEEEEEEEEEEEEEEEEEEEEEEEEEE.

I didn't take many progress photos because I focused on getting it done as fast as possible. Today is my last day to get all Desucon cosplays done because I will be leaving tomorrow early. Here you have the few photos I actually took:

Sides had just been sewn together
Lining sewn to the same point as earlier photo
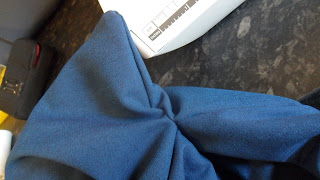
Something just ate my arm!!
Ah, it was just the okumi panel being pulled rightside out...
Oops
Finished
I'm not too happy about it because the lining is too short and creates random folds and bumps at random places... ugh. Oh well, it's still usable so it will have to do for now.

Soon I will upload some Okita preview photos, stay tuned ~

June 4, 2012

Head accessories + Ichito WIP

 Hi guys!

I've been sewing on Okita's yukata today, but I didn't take any photos of the progress so I'll make a blog post about it later when it's finished instead.

I made Ichito's eye wrap thingies and hair piece today. Not so much to say, pretty easy to do.


Making of the hair piece.. (it's covered craft foam)
I also got my commissioned wigs today so I could finally take some WIP photos without face censors lol. I had one problem though, the wig is very short in the back... or I have a too big head? I don't know, maybe my hair was at fault because I styled it pretty heavily on the morning and very quickly put the wig cap and stuff on.. maybe works better if I pin my hair up (so hard to pin short hair..) and/or flatten it with water. We'll see, otherwise I have to use those head wraps to cover what can be seen of my real hair under...

Oh well, have some WIP photos. Pardon shoes are not done and I was too lazy to put on blue nail polish and I don't have white face powder yet... lololo derp.

I don't know why my hands always end up so close to my face somehow...
I'm fabulous.. err...
ICHITO, Y U NO STAND LIKE A MAN?
Did you notice.................. DOTTED SOCKS BLASPHEMY??! Badumtssh ~

Oh, and one thing. This cosplay already earned the following titles:
• Ultimate everything-falls-off-every-minute cosplay
• Ultimate I-look-like-a-walrus-in-this cosplay
• Ultimate it-feels-like-I-have-no-pants-when-I-actually-do cosplay

Uhum, I'm outta here!

June 3, 2012

Okita's yukata parts cut out + Ichito obi

 Hi everyone.

Mom helped me cut out the pieces for my Okita cosplay.. but... she made a measurement mistake and we ended up with a knee-length kimono instead of an ankle-length. OTL Mom told me she had earlier been thinking "I'm surprised we haven't done any cutting mistakes yet", you shouldn't have thought that. lol Oh well, I will have to add extra pieces to the front and back panels to get the full length and that means I'll have to make an extra seam where there should be none; I have no other choice because this particular fabric was a leftover piece from the store and only 2,8 meters long and yeah, no extra fabric available and no time either. If I had wanted the body of the yukata to be 'whole' after that error we would have had to put seams in the upper part of the sleeves instead. Eeew. I'd rather have those seams a bit under my butt on the yukata itself than on both sleeves...
Oh, and I have to line this thing too because the fabric is a bit thin and to help it fall better and well, to make it a bit warmer because Okita only has one layer..

Most of the parts cut out
I got lazy so I didn't start sewing it.. I'll do it tomorrow because I have no school...

Some time later I figured I could at least sew Ichito's obi so I'd be one step closer to goal. So first I cut out two long pieces (150 cm each) of that fabric I took inside earlier. I sewed them together at one end and zigzaged around and then I folded it in the middle and ironed to create a middle fold. Then I started folding in the sides all the way. Also folded in the ends.
It was very easy to do, didn't take much more than maybe 15 minutes ~

After I had ironed everything ready
Sewing it closed
Finished obi
That's all, see you!

Modifying Ichito's "jacket" + found last of the fabrics

 Hello!

A few days ago I tried on Ichito's "jacket"-whatever-it-is and noticed that it needs a slight make-over. I needed to cut those front panels into a more triangular shape because I noticed just hiking them up didn't do it. I also needed to take in the back of the garment because it was too big.

derp
Notice triangular pointy front panels
So what do I do? Cut it.

Before any modifications. Poor thing thought it was con-ready..
Marked cutting line
Test photo after cutting and hemming
Took in the back seam and ironed it..
Folded in front panel sides too and sewed around them
Testing after the operation with a substitute sash (blue kimono under)
Back side (näytän niin mursulta! :'D)
I think it'll have to do, I can't take in so much more from the back part closest to the collar.. so it's bigger up and narrows slowly the farther down it gets.

I also helped mom moving her former fabric store's leftover fabrics (those that had been stored in big black bags in the old storage house) to our attic and I found some fabrics I can use for Ichito's obi and shoe covers. Yay, free fabric once again. <3

That rib knit fabric just doesn't want to photograph its real color... it's closer to an army green...
When mom is done outside she'll help me cut out the fabric for Okita's yukata so I can start sewing it. There will very likely be another blog post about it later today.

Until then, see ya!

June 2, 2012

Ultimate kimono making update

So today when I woke up I started sewing and I sewed and I sewed and I sewed... and then I ate dinner and then I sewed some more. It took me the whole day to make Ichito's kimono; I'm finally done and I'm so happy I managed to get it done in one day.. but I'm not so happy about the fact that my back now hurts as fuck from all that sitting and bending forward when sewing...

Note! This is not authentic but it looks okay for cosplay purposes! (also the sleeves are male style)

I'm tired so I will not explain every single thing I did, pictures will have to do for most of the how-to's today. Oh, and the first two photos were taken a few days ago and I have no pictures of the first cut out fabric step, not like there was anything to show because it was just rectangles anyway...

Panel cut out and ironed in the middle (shoulder part)
Sketching neckline cut ideas on fabric
Neckline cut out...
... and also backside sewn together
Ironed shoulder part again to make life easier before attaching sleeves
Pinning sleeves in place (ironed sleeves too and aligned shoulder and middle seam folds)
Sleeves attached, testing it on
ALL MY HATE TO SEWING ARMPITS CLOSED. ALL MY HATE ...
... and this is why. FFFFFFUUUUU Mega wrinkle derpherp durr
(had to redo it three times before it was not-that-bad)
Armpit sewing, third and final try (still wrinkle-ish on right side but didn't bother to fix it...)
Sleeve 'bottoms' and side seams closed
Folding in and pinning sleeve openings
Sewing sleeve hems...
Looked like this. Need to fold in sleeve opening once more...
Finished sleeve opening
Spread out kimono panels and took a look... what is this I don't even
Cut the shit straight
Cut out okumi panels (used double fabric) and ironed them
Ironed side seams and back seam open (looks better!)
Attached okumi panels
Cut out and ironed collar pieces
Sewed collar pieces together at one end to get one long piece
Zigzaged okumi panel ends before attaching collar (collar also zigzaged around the edges)
Pinning collar in place before sewing it on
Folded in end of collar and okumi panel and hemmed them
Finished kimono, trying it on
Showing sleeves
Kimono laid flat on my bed lol my feet can be seen (sorry bad lighting, it was late)
Sorry for the lack of detailed explanations and that I didn't show photos of every step.. but I guess it's easy to follow anyway. *shrugs* Oh, and I made it shorter for ease of wearing with hakama.

That's it for today and tomorrow my plan is to make Okita's yukata from start to finish afdghsah.