Showing posts with label sewing. Show all posts

March 11, 2016

Dota 2 Invoker cosplay WIP part.1

What's up geeks? :D

I've decided to start on my next big cosplay project! *badum tsssh*
I don't have a set deadline yet for when I want to be finished with this costume but I'm currently aiming for summer 2017. I'm not making any promises regarding the debut con etc but I can say for sure that this cosplay is part of a cosplay group with friends!

The character I will be doing is Invoker from Dota 2.
*drum roll*


I'm pretty sure no one saw this coming and, honestly, if someone had asked me about Invoker half a year ago I'd been like "who's that?". xD I decided to do him on a whim after Närcon Vinter when me, Hitsu and Sacchan were talking about Dota 2 at Hitsu's place. I actually haven't even played the game myself but because Hitsu is a big fan of it I've seen her play and talk about it. I've always had an interest in this kind of games anyway, but because my internet is shit (and my computer is dying) I can't play it comfortably. :/ So yeah, Hitsu mentioned that she had planned to cosplay from Dota 2 and asked if I was interested; I had been wanting to do a pair cosplay with her for years since we're really close friends since school times and we have supported each other a lot during tough times etc. I thought that because she loves Dota 2 then I could join her in the fun and hey, why the hell not? :D I had no clue about the characters though, so I ended up asking Hitsu for suggestions. She first suggested Juggernaut (because of the samurai inspiration) but I didn't really like the design. :/ She then told me that she knew a character that I might like and so she showed me the Invoker and, well, I was game on! 
I don't say no to a fancy badass magician who gives me a reason to do an awesome cape and gain a fair amount of new learning experiences! Besides, his color scheme speaks to me and I get more use for my elf ears. I've always wanted to do at least one wizard cosplay – now I got one! o/

I started working on Invoker on 18th February 2016. I have sewing class in school and one of my teachers is awesome; she can draw patterns by free hand if I just show her what I want to make. So yeah, I had totally saved some reference photos on my cellphone and showed them to her and then I spent some time sketching the different clothing pieces on paper, to give her an idea of what they looked like when separated.

My sketch paper with the measures scribbled
on it by le teacher. (psst, I know that the vest is inaccurate)
 
My teacher started taking some measures and I gave my opinions on how long this and that piece should be, the shape of the sleeves and so on. Some of the body measures are inaccurate because she took them over my clothes and yeah, because it's winter I am wearing multiple layers and so suddenly my ass is 10+ cm wider than it actually is, lol. *coughsomanypantscough*
We got almost all the patterns drawn and cut out on the first day, here it starts!

I went to fetch some fabric from mom's attic on the following weekend and I ended up picking out a fabric I thought I'd never touch for cosplay purposes, even if I had a 10-feet pole and rubber gloves – are you prepared to hear it? *silence intensifies* .............................................. SATIN.
Yes, that shiny fabric that all cringeworthy cheap online costumes are made out of! :'D But before you decide to mentally roast me, fork me and throw my remains into a fucking sharknado I want to justify myself – not all satins look horrendous to the point you want to gouge your eyes out. You see, mom had a roll of this beautiful plumish violet quality satin fabric that actually looks good. Yeah, say it with me – satin that looks good. Can you believe it??

I decided to use the satin fabric for the jacket or undercoat or whatever you want to call it, of which basically the sleeves and the "tails" are visible. I honestly didn't want to go buy 4 meters of fabric when I could get 4 meters of satin fabric for free and hey, I've seen another Invoker cosplayer online who used shiny fabric for the jacket thingy too and guess what? It looked amazeballs!
So yeah, I thought why not and besides, I don't think it's that off because Invoker is a badass magician and I often imagine magicians with shiny precious-looking robes...

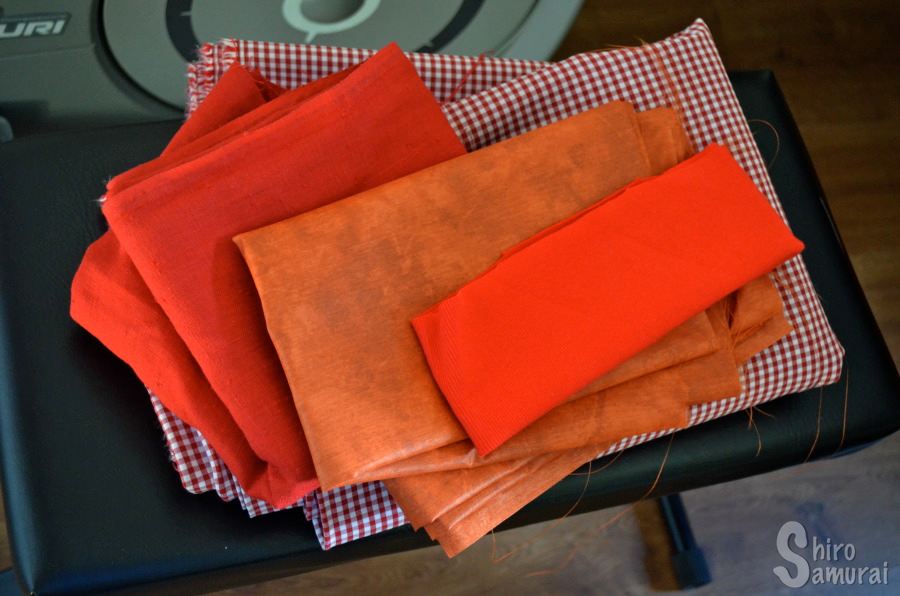
Some of the fabrics etc needed for Invoker.
 
Next time I had sewing class was on 1st March and I brought with me the satin fabric to school because we had prepared all the patterns for it. It turned out that our original idea wouldn't work because we had planned to do the jacket in two parts and thus of two different fabrics and it required that the top would stretch and/or have a zipper. We scratched that idea altogether and decided on a different approach, just so that we wouldn't have to redo most of the patterns. So yeah, what we did was that we decided on splitting the jacket so that the top part of the jacket would stay the same (with the sleeves), except that we would widen it enough so that I could fit it over my head, but the lower part would be the skirt thingy instead of the jacket "tails". This means that the jacket bottom, aka "tails", together with the white front flap thing and the triangular back cape would be a separate piece that attaches directly to the waist. I'm sorry if my explanations make no sense. XD

To check the fit of the widened top part of the jacket pattern, that was the now-to-be-jacket-with-skirt hybrid, I did a quick prototype of a test fabric. It fit well and so I used the prototype as a pattern when I started cutting out all the parts that were to be made of the satin fabric. Hhhhhh.

Cellphone photo of fabric cutting (yellow is the prototype).
The colors are raped, lol.
 
The prototype jacket top was really short and it was originally made short so that the "tails" would split very high up on my waist to give the right look when worn. But yeah, because the top was now to be attached with the skirt and not the "tails" I could afford to lengthen the top. No need to be croptop!Invoker. xD

During that class we cut out all the pieces needed out of the satin fabric. For next class on 3rd March I brought with me the whole bolt (yay mom's fabrics!) of a really dark purple fabric that I had planned to use for Invoker's skirt thingy. I ended up needing to take the fabric width 3 times to get enough fabric for the deep folds of the skirt – that's a lot of fabric!

School's serger. Always hella convenient!
 
I had time to go through all the cut out pieces so far with the serger and OH LORD I'VE FOUND MY NEW NEMESIS WHEN IT COMES TO SERGING – IT'S CALLED DOING CURVES!! ( >д<) It's 99% impossible to do some curves and sharp angles and having the serger actually catching and sealing the edges without the automatic cutter (that moves when you sew, in case someone is not familiar with sergers) taking a big bite from places where you really don't want it to cut. Even my teacher (who's a sewing artesan) said it's impossible to do some curves so yeah, there seemingly is no magic trick that I simply have not been told about...

I sewed the shoulder seams and the side seams closed on the top and later on I went to fetch some white cotton twill from Eurokangas for the bolero, aka the sleeveless vest thingy. I know that at mom's there is a perfect golden fabric that I could make the golden details out of (it doesn't even fray!) and I plan to go fetch it this coming weekend. At mom's there should also be a big roll of white fake leather which I'm planning to use for the cape, since I most likely will want it to be rigid and actually not fold like a normal cape. The reason for this is that in the game his cape stands up on its own and the full design of it is always visible. It should look like some really extravaganza fancy cape with its own will, lol. Fuck gravity!

Invoker reference.
 
I'm not yet sure what I'll make those shoulder armors out of but it's either gonna be the same leather as for the cape (assuming it's suitable, I haven't seen it in person yet) or worbla. I'm honestly a bit intimidated by making it out of worbla because I'm still really new and inexperienced with it and yeah, Invoker's armor would need quite some thinking and skills to get to look nice...

I have most of the fabrics ready or at least planned out. I only need to find something for the gloves (the black parts), the front flap and the white-ish waist & butt skirt thingy. I honestly have no idea what to call it. xD I also need to fetch buttons for the vest but that shouldn't be a problem seeing what a shitload mom has in a box, lol. I might need some fabric for the boots though, if I decide on making them crazy long, as they seem to be on the very first Invoker picture I posted.

Invoker reference without cape, shoulder armor and arm bracers. (and hair, lol)
 
I'm thinking about doing the golden chest armor out of worbla, golden leather (if I can find any) or polystyrene sheets, I haven't decided yet. Those decorations on the front flap I'm not sure about since I have no idea whatsoever if worbla sticks to fabric. Anyone know?
I'm planning on making the arm bracers out of worbla or gold-colored leather as well.

So yeah, I have many things planned out for Invoker but luckily this isn't a cosplay project that needs to be finished anytime soon; it's a more long-term one so I'll have plenty of time to take it slowly and think along the way. It feels good to not have a definite deadline that is all or nothing, hah.

That's all for this time. Stay tuned for the second part!

January 26, 2016

Touken Ranbu Kashuu Kiyomitsu's scarf and tasuki

Hello again!

My first con is closing in and I'm starting to really rush to get things done! I'm also crossing my fingers that some stuff will arrive on time, especially considering how shitty the post has been lately. One of my packages got sent back to Japan before I even got a notification that it had arrived, boo. I'm 95% certain about my cosplay plans but I can't publish them just yet because yeah, some critical stuff has yet to arrive. Sorry about that. Cosplay plans will be released as soon as possible!

One of the characters I will cosplay at the con is Kashuu Kiyomitsu's casual (aka uchiban) outfit. I sewed the scarf at mom's last Sunday. Luckily the kimono, juban and hakama I can pull directly from my kimono collection since I happen to have perfect pieces for him, haha. But yeah, the scarf I had to make and I started making it with the thought that it's gonna be a piece of cake but yeah, it took me longer than anticipated, mainly because I had problems figuring out the best way to do the tassels at the ends.

Really quickly thrown together outfit test.
(note: mirror photo! aka corpse mode)
The photo quality is shit because the sun had gone down for hours ago and yeah, I only had my crappy apartment light to count on. ._. I couldn't be bothered to dig out my juban so I just kept my long-sleeved shirt under, lol. I might do a more proper test before the con too, we'll see. Heck, I didn't even tie the hakama...

I barely took any progress photos of the making of the scarf; I was too busy trying to get it done before mom would drive me back home. I do have a few pictures to show though, but they're all taken with my cellphone so yeah, the quality is sub-par at best. ^^; Oh and yeah, my cellphone fucks up the colors real bad, lol.

Kebab arm! :DD
I found a suitable fabric in the attic and used the whole fabric width twice for the length; I made the scarf double so that it would be a bit thicker and look nice no matter which side was showing. I sewed the two pieces together and then put right sides together and sewed the scarf into a long tube. To turn the tube the right way I threaded it on my arm (I had left the ends open), like on the photo above, and just grabbed the edge and turned it around.
I had several ideas about how to make the tassels, ranging from using silk ribbon to just cutting them straight out of the fabric. Mom also did a fire resistance test on the fabric to see if we could simply just burn the edges, to keep them from fraying, but the fabric caught fire way too easily so it wasn't an option. Yeah, basically just us trying to see if there was a way to skip the tedious zigzaging part. xD
In the end I decided to cut out two separate pieces (one for each end) from the same fabric and then pre-sew the zigzag on it and then cut it up, next to the zigzag.

Put our idea to the test – it works!
I did try first to cut and then do the zigzag but oh lord, it was such a pain in the butt that I quickly went back to the original plan. Mom later came to ask me how it went and my answer was a straight "tää on perseestä mutta toimii". :DD lol

Second piece done and ready for cutting.
With the tassels done I just took the open edges of the scarf, folded them inside, put the tassel part inside and sewed the whole shit closed. It was a bit hard to get it to look nice on both sides because yeah, this fabric is the same type as the one I made the Star Wars robe from and, well, it lives its own life. I had to rip up the "underside" twice and redo it because it looked like shit. xD

Tassels pinned in place.
I realized a few days later that the tasuki I had used for Yamato no Kami Yasusada was too short to work for Kashuu. The reason is because they have it tied differently – you can see it on the official art book. Yasusada has the tasuki sleeve cord tied the usual way in the front but Kashuu has it tied in a ribbon at the back.

Touken Ranbu art book reveals Kashuu's back!
I had to ask some of my kimono friends how to tie it like that and I got some good suggestions how to make it work! I ended up having to try it several times and it was harder than I thought to get a neat bow. I will need to practise a lot more... or ask someone to tie it for me directly on the back. #lazy

I don't have any progress photos of the tasuki, except for the one below. Yeah, I decided to make a completely new one for Kashuu because I want to be accurate and hey, the fabric only cost 3 € per meter!!
I made it in school today during my handcraft class. The tasuki was made the exact same way as the scarf but because it's a lot narrower I had to use a wooden pole, to push it back to the right side, after I had sewn it into a tube.

Tasuki in tube form, half-way done with turning it back to the right side.
That's about all I have to say for this post. See ya later and thanks for reading my blog! ^^

December 25, 2015

Samurai Deeper Kyo's Hotaru cosplay progress part.3

Hi guys!

This here is the third part of my SDK Hotaru progress posts – for the previous parts click here for the first one and here for the second!

Okay so, after I had painted and set the design on the sleeves it was time to actually start sewing the pieces of the white kimono. I zigzaged around all the edges at school and then, for once, I took my project with me during a visit to mom's and I of course took the opportunity to sew while there because, eff yeah, high-tech sewing machine and not some old crap!
I again started by sewing the backseam and then attaching the sleeves. Before sewing on the sleeves though I decided to pre-hem a bit of the end that would be the arm opening, for a nicer finished look. I ironed approximately 27 cm on each side from the center fold of the sleeves and then just straight stitched it down and ironed it again.

I apologize for the crummy cellphone-quality photos ahead; I didn't have my SLR camera with me in school/at mom's during most of this project. Most photos show the colors inaccurately.

Sleeve with the arm hole opening already hemmed. Notice
how the lower half is still raw. (full length of the sleeve is not visible)
After that I sewed the rest of the sleeves and finished them up. Of course when I closed in on the armpit junction I felt the rage coming. In case you've somehow missed it... I HATE SEWING ARMPITS, ESPECIALLY ON KIMONO. The reason for this is because it always ends up looking ugly as fuck, no matter how careful I am. I guess that's what you get from having straight pieces...? Oh well, whatever the reason for why it always ends up bumpy this time it was no different...

I hate you. All of you. 8C
Oh well, I was frustrated so I just started ripping up the armpit and meanwhile I was doing just that the solution suddenly came to me why don't you leave some centimeters of the back of the sleeves open? That way you'd get a neat appearance, without sacrificing how the final thing will look when worn, because the very top of the sleeves (aka closest to the armpit) will rarely be seen anyway; it's not the end of the world if there's a small "airhole" there.
So I tried that and lo' and behold, it worked wonders! I then just hand-sewed the folds/hems in place (those 7 centimeters of the opening) so that they wouldn't flop around once the ironing "press" effect wears off. 
Oh well, I went to iron all the seams open and then I tried to get rid off some wrinkles that had accumulated over the weeks. This seemed like a good and nothing-can-go-wrong idea at first but nope, of course not. Why can't anything go without problems with this cosplay? ;_; I swear I've been having horrible luck with this cosplay from the start – even things that are simple to sew fuck up for one reason or another; it's really irritating. But yeah, guess what?
...
So I'm just ironing my Hotaru kimono and it's going nicely (for once), until I accidentally iron the front, while the backside fabric is wrinkled right under it and –BOOM!– the back gets some super pronounced wrinkles because I ironed over it! All because I didn't double-check that the back was straight, ugh. ._. Oh well, I thought "no probs, I can just straighten it out" and then I turned the kimono body around, the wrinkles of the backside now facing me, and started to iron... AND THE IRON DECIDES TO BE A DICK AND LEAVES SOME NASTY YELLOW DISCOLORATIONS ON MY PURE WHITE FABRIC FFFFFFUUUUU-- (╬⓪益⓪)
Okay... so I'm definitely not happy at this point because seriously, when it was for once going okay something that is out of my control (aka the iron) screws up my cosplay... and of course when the fabric is a pure white out of all possible colors. (҂⌣̀_⌣́) The worst part is that the yellow discoloration got on those now-very-pronounced wrinkle folds on the back, near the sleeve's lower attachment point...

Fuck everything.
I'm almost panicking but at the same time I'm trying to tell myself "nah, it's okay, it won't happen again" so yeah, I continue in the hopes that it was just a case of one-time-only trolling. WROOOOOOOONG~~ :DD Surprise? No?
The iron poops again and this time on a wide area on the upper half of the right front panel. URRRRGHHH!! I just wanted to ragequit for the day, but I continued so that I would at least finish hand-sewing the other sleeve's backside openings. After neating up the backside openings me and mom went on a quick drive trip to a store to buy some stain remover because holy crud, if this thanks-to-the-iron shit doesn't go I guess I can call my cosplay some sort of ruined... or at least miscolored. But hey! Thankfully the following day I returned to mom's and tried the stain remover and guess what? It did work and my hope on this cosplay was thus restored!

In progress Hotaru's main kimono hanging to dry
in my apartment, after stain removal.
The next time I worked on this cosplay was in school. I cut out the pieces for the okumi panel (yeah, I had left it on purpose so that I could check some measures before) and then, before sewing them onto the main kimono body, I cut the bottom hem straight. For some reason, no matter how identical I cut the pieces and how carefully I measure them, they're never perfectly aligned once they're sewn together. ._. It's kinda annoying that I always end up having to trim them all into the same length (the shortest piece deciding) and thus my final product always ends up a few centimeters shorter than intended. Bleh.

Before straightening the bottom hem.
After that was done I sewed on the okumi panels, after having zigzaged them, of course. I don't enjoy fraying cosplays lol.
I finished this white kimono at mom's on Saturday, 12th December. I cut out a reverse drop-shaped half on each front panel's top (before the okumi starts) to make place for the orange collar, which I then sewed on; I of course ironed on some interfacing fabric, for stiffness, on the inside of the collars before I folded it in half and sewed it on. I finished the bottom hem by folding it twice. I also ironed out some wrinkles and steam pressed the sleeves so that they wouldn't bunch around.

Collars pinned in place, ready to be sewn on.
If anyone remembers on the second progress post I mentioned that the under kimono might have too short collars and well, I tried it on together with the white kimono on top and yes, it does. :( The collars would be okay if the kimono was worn "normally", but since Hotaru wears it rather open in the front (and so it shows his shoulders a bit) it really doesn't work; the collars of the chequered under kimono end before the overlap of the white kimono so, yeah, it just doesn't look okay because you can clearly see that the collars are too short; they just suddenly end way before the white kimono's collars do.
Oh well, the same fabric that I used for the obi was still selling for only 3 € per meter so I went and bought 3 meters of it. I'm not gonna go into detail on how I made it because it's basically the same as the white kimono, except no sleeve painting. -.- I'd feel like a broken record, heh. But I'll just say at least something and post a few photos of it because yeah, no progress proof is kinda boring, right?

Sleeve is done and I'm about to start sewing down the side seam.
Notice the small opening on the very top of the sleeve; it's to avoid
the issues I keep having with the armpits being all wrinkly.
As per usual I cut out all the pieces, zigzaged them (no one in school knows how to fix the overlock, not even the teachers so yeah, no nice overlock seams on this one... ._.) and started sewing the whole thing together. I realized after I had attached the sleeves and sewn them up that I had miscalculated the measures of the attachment point so yeah, I ended up with really narrow-fitting sleeves for a kimono; it feels more like wearing a dress shirt at the armpits than a kimono, lol. When I don't fuck up the collars I fuck up something else; I really have bad luck with this cosplay. OTL I really couldn't be bothered to redo it because I would have had to redo my pre-hems on the backside of the sleeves and, well, that'd be a lot of extra work and I honestly just wanted to get this thing done as fast as possible because yeah, I was sewing it together on 25th December, aka Christmas day. It's still wearable and won't show so yeah, whatever. (u_u)

Sleeves completely done and side seams sewn closed.
Behold my narrow sleeve attachment, ugh.
I ironed and steam pressed all the seams and the sleeves for a nice finish; I really dislike how bumpy big sleeves look after you've sewn them. It bothers me too much if I don't flatten them, lol.
One thing though – always check what ironing settings you need to use for your fabric! I namely thought that my fabric was 100% cotton but, before ironing, I had a scratching in my butt that I should double-check what the fabric care instruction note that came with the fabric says. Luckily I checked it because my fabric was in reality a cotton blend so yeah, ironing it on the three dots setting would have damaged it because the recommendation was two dots. Always be careful! Burning your precious fabric sucks...

Nicely ironed sleeve.
I attached the okumi panels, cut the neck area to round it off and attached the collar. I finished with hemming the bottom.

Sewing on the collar.
I sewed this thing together in a couple hours and it feels quite good because now I wouldn't miss the movie that I wanted to watch from television later, lol. xD With the under kimono completed I'm finally done with all the sewing work for Hotaru – now I just need to finish his sword (I've started it and there'll be a post when I'm done!) and make his tengu geta. I'll also do some kind of wig test and a preview post later, so stay tuned for those as well. ;)

Finished under kimono.
Thanks for reading and see you later!

December 13, 2015

I made a Jedi robe from Star Wars!

Hello geeks! ~

Okay, so I sewed a brown Jedi robe/cloak from Star Wars from scratch in like, two days. 
– The reason?
I thought I could dress up for the upcoming world premiere of the Star Wars: The Force Awakens movie, since I'm a volunteer worker at the town's cinema. And hey, great excuse to be nerdy and cosplay outside the walls of my apartment! :D Bonus points for the cinema encouraging the workers to dress up! For example: when the James Bond movie Spectre premiered earlier this year all workers on that day were formally dressed and wore black/white suits.

So yeah, I went to mom's over the weekend and spent like all my time sewing this robe together. I'm sorry but I don't have many photos of the progress because I was in such a hurry to get it done in time. I'm still gonna try to tell at least something on how I made it, even though this post won't really be detailed enough (I guess?) to function as any kind of tutorial on "how to make a Jedi robe". Sorry. ^^"

As a base pattern I used some very basic men's fleece jacket in, like, the biggest size possible – XXL. The pattern was then widened and lengthened to the galaxy moon and back. The pattern was also modified so that the sides of the body widened towards the bottom and the underside of the sleeves curved into small "trumpets" towards the arm openings, aka what I'd call 'wizard sleeves'. The hood was greatly enlarged too, to the point it looked comical. The hood was cut out twice (four pieces in total) so that it would be doubled on the final product.

I started by overlocking all the edges, of every single piece, to keep them from fraying. After that I sewed the shoulder seams together.

Shoulder seams done.
Next up I took the sleeves, folded them to mark out the center back and ironed them. It doesn't really show on the photo below but the edge further away is the arm opening and the end hanging off the ironing board has a slight tip (because of the trumpet style) which proved to be an annoyance when I hemmed the sleeve mouths later, lol. I actually had to hand-stitch the tips in place so that they'd stay flat.

One sleeve folded and ironed.
I first sewed on the sleeves and then sewed the underside of the sleeves closed and continued all the way down the side seams. Now it started to look like something!

Sleeves attached and side seams closed.
I hemmed the arm openings by doing a big fold of a couple centimeters. I always steam pressed seams open when I had sewed something together and I also ironed folded edges before hemming them. This fabric is elastic so yeah, it was needed to iron things in place because the fabric is seriously alive and did cause me some inner cursing during the process, lol.

One hood piece put in place on the fabric, to act as a pattern for cutting out
the "double hood".
Next up I think I went to straighten (read: cut) the bottom because, as is tradition for me by now, it's never ever straight down there – aka all pieces are not the same length. I don't know why this keeps happening because I sure do cut the pieces the same way and I always iron to mark out the center spots (shoulder folds etc) before sewing so yeah, it should be aligned perfectly but lolnope.
Oh well, I went to the trusty overlock to get the job done faster but guess what? I possess the luck of Donald Duck (it rhymes, hihi) so of course when I started sewing the machine made some really loud and scary sounds that sounded like I just tried to start a fucking lovechild of a chainsaw and a snowmobile – and a really old painful one at that.

Overlock, y u do dis to me? ;__;
Yeah, that's how much I had time to sew before it died on me...
Oh well, no can do except take out the ordinary scissors, cut the shit straight and do the good ol' zigzag instead. With the bottom hemmed I was nearing the end – now I just had to hem the front and sew on the hood. The hood did reveal itself to be the most annoying part of the whole thing though. xD I did hem the front "flaps" first all the way down to the bottom and then I started to sew the hood together; I first took two of the four pieces and united them so that I got one complete hood – a crazy big one at that. I then took the remaining two pieces and did the same thing to them and now I had two hoods. What was next was to sew both of these hoods together into a single hood that wouldn't show the underside (aka seam side). I thought that this was a good idea because the guys in Star Wars don't always wear the hood so yeah, when it's just chilling on the back it would still look neat and clean since even the inside of the hood would look the same as the outside.
The thing with sewing the hood was that the neck (aka the spot for attaching the hood on the cape) was only around 60 cm around while the hood was 112 cm.
See what this means? – Yep, make huge-ass pleats so that it will fit in!

Pleating in progress. I decided to make three deep folds on each side
of the middle seam of the hood.
I sewed the pleats in place really carefully (so much fabric layers!) and I was kinda expecting the needle to break on the sewing machine... but it didn't, phew. Next up was to take the "inner hood" and pleat it as well.

Showing that the underside (seam side) of the outer hood is pleated and sewn on; the
"inner hood" is yet to be pleated and attached to the body of the cloak.
"Inner hood" pleating in progress – one side done.
I did some fancy stuff by sewing the pleats of the "inner hood" in place without actually attaching it to the cloak itself yet – this made it possible for me to hem the "inner hood" on top of the outer hood's seams and thus hide all the seams for a very clean and professional look. The problem is that, meanwhile I was pinning the hem folds, mom came and took a look at it because I had joked that this is sooooo gonna break the whole sewing machine – worst part is that she agreed because holy crud so many layers and pleats had accumulated in that hood attachment spot by now that sewing it by machine was out of the question; not even the thickest 100 numbered needle would make it. So yeah, I had to sacrifice some Neatness Pro™ points and just skip the actual hem folding and just sew it on as a single layer, no folding. I still of course sewed the edges of the "inner hood" on top of the outer hood's seams, to hide the "mess". Not like it was messy because clean overlock seams but yeah, still looks better.

Finished Jedi robe!
Back view of the hood when not worn.
So yeah, this is what I've been sewing on the whole weekend. It was really stressful to make it in such a short time (intense sewing, go!) but at least I can't call it rushed because the sewing work is still clean, save for a few really minor things (mostly hemming) because of the fabric living its own life...

It's gonna be fun to wear this at the cinema and be a random Jedi knight!
The issue is that I'll have to throw the rest together from whatever I can find from the closet since I won't have time to make or buy the rest of the parts. Now if only I had a lightsaber...

That's all I have for this time!
Shiro Samurai says goodbye!

November 28, 2015

Samurai Deeper Kyo's Hotaru cosplay progress part.2

Oh hiya!

I've started working on my next cosplay namely Hotaru from Samurai Deeper Kyo. On this here second part I'm gonna go through the making of his two kimono and the "obi" (sash). :) If you missed the first part of the progress you can read it here: part.1 progress post

I started out by making the inner kimono. It's always pictured with some kind of chequered pattern, so that's what I went for. I picked a close enough fabric from mom's attic (because eff yeah, free fabric!) that is white with dark red small chequered design all over it. I would have preferred an orange fabric but mom didn't have any... Oh well, if it starts bothering me in the future I can always just sew another one.

Hotaru, as seen in the manga.
His inner kimono rarely shows more than just the collars peeping out. I decided to make a very basic kimono pattern (even though it's not really needed since it's all just rectangles, more or less) just to have it for future projects, to save some time and headache.
I decided to make the sleeves short –like on a martial arts gi– to save fabric and make it easier to wear; they won't ever show anyway lol. So yeah, I just cut out all the pieces and started by overlocking all around the edges on everything.

I apologize for the crummy cellphone-quality photos ahead; I didn't have my SLR camera with me in school during this project. Most photos show the colors inaccurately.

This is all the patterns I needed for the (knee-length) kimono. The biggest piece
is the body panels (only half of actual length), okumi panel, collar piece
and sleeve. Note that the sleeves are budo gi style.
I then just naturally continued by sewing the pieces together, starting with the back seam and then the sleeves. I had some problems with the point where the sleeves meet the body, aka the armpits; for some reason I just can't get this area neat no matter what I do – it's the bane of my sewing existence lol. >_> Oh well. At one point I couldn't work more because I didn't have any interfacing fabric so yeah, I had to wait until I got that from mom before I could fix the collar. I decided to do the sash meanwhile so that I wouldn't waste any class time.

Fabric for the obi/sash.
Nothing to say about the making of this – I just took a long strip of fabric (the whole fabric bolt width) that was approximately 15 cm wide, folded it in half and sewed it shut after zigzaging around the edges. Oh and yeah, I had been to the fabric store earlier and I had found this perfect orange chequered fabric and guess what? >u< The best part was that it was on a permanent sale for only a puny 3 € per meter, zomfg!!
I had not seen it before in the store Eurokangas, y u hide stuff from me? but I obviously bought it for the obi on the same go when I went to fetch white cotton twill for Hotaru's main kimono there anyway. I was wondering if I shouldn't buy the orange fabric for his under kimono too (because it's so cheap) and make another one...?? I can't decide!

But yeah, back to the inner kimono. Because I started with rectangles for the body panels I had to make room for the collar so that it would fit. I cut two slits into the shoulders on the very top of the front side. I later rounded the whole collar area, using the slits as reference, so that the collar would fit nicely.

Slits cut for the collar placement.
I went to pick up some interfacing fabric and some orange fabric for Hotaru's outer kimono's collar. Of course I picked the same orange fabric that I had used for his pants on the earlier post.
But yeah, next time in class I continued to sew the inner kimono. I started by ironing on the interfacing fabric to the collar and then I sewed on the okumi panels to the front. After that I sewed on the collar and cut off the excess when I reached the end point. The raw ends of the collar I just folded inside and ironed in place so yeah, the bottom ends are not actually sewn shut.

Collar end folded inside and sewing.
Lastly I fixed the hem and then ironed all the seams open, for a nicer finish. I noticed when done that this kimono ended up shorter than I had first thought – it barely falls to my hips. This is actually not a problem because I'm just gonna tuck in the hem into the pants anyway so yeah, the less fabric there is the less bunchy, unfomfortable and ugly it will look. :'D But yeah, what I hadn't thought about was that because of the short length the collars are shorter too, which just miiiiiiiiiight be a problem. I can't tell just yet – I need to try everything on once finished to be able to judge.

After school I went to buy fabric paint in town for the Yin-Yang symbols on Hotaru's main kimono's sleeves and well, much to my lack of luck there were like all the colors except fucking orange. I mean, there were even several different shades of "light skin" colors (the pale peach-y shades) but not a single orange. Are you kiddin' me? -.- I don't know what's with this cosplay – nothing goes as I had planned it, not even the easy things that I should be able to do in my sleep go without errors! #badluckcosplay

Art from one of the "chapter pages" (163 to be precise) in the manga.
I'm assuming that this one is a fan coloration though...
I settled for buying a shade called "chestnut" which is like... err, if that's the color of chestnut then I've never seen a chestnut in my whole life lol. ._. It's a dark orange, close to the reference photo above (that's why I'm showing it) but with a very slight hint of brown. It was the only color available that was even sort of reminiscent of orange lol. It sucks to live in a small town where there's little to choose from when it comes to crafty stuff.
The thing is that because I'm doing the manga version of Hotaru the colors are inconsistent as hell – on some photos those sleeve symbols can be red, on the next bright orange and on the third a "sketchy" style filled-in gray. My personal preference is leaning towards orange so orange it is; luckily I already have some white fabric paint at home so I can lighten the orange paint, if needed.

Back at school I cut out the pieces for the white kimono using the patterns I had made earlier. I decided to make the sleeves really long since Hotaru's sleeves vary in length from panel to panel but yeah, most times they do look wide and flowy. I also wanted to have biiig sleeves because it's awesome. Period.

Flowy sleeves are flowy.
What has harder to find out though was what shape his sleeves had – on most images it was impossible to make out what the bottom shape of the sleeves were. I thought for the longest time that his sleeves narrowed down to pointy tips but yeah, I wanted to be sure so I started scrolling through the manga. After staring at countless images of Hotaru and thinking it through I decided to go for square sleeves on my cosplay of him, mainly because that's how real kimono sleeves are. I could just as well have opted for doing more fantasy-like pointy sleeves (it's not like Hotaru is the only one who took some liberties from "kimono rules"!) but nah, I'd rather do a bit more of a "what if Hotaru was a liiiiiiiiittle bit more accurate" approach. Hahah. Well... that accuracy thing gets thrown in the wall anyway because of his sword and tengu geta, but we'll get to that maybe later.

I even made a quick comparison collage!

Open in full-size to get bigger version.
Oh, and this is of course just how I personally interpret and view his sleeves on every single image I decided to use; you might view them differently and that's okay too ~

But hey, I had just enough fabric to get all the parts I needed (2 meters) with no scrap pieces left, phew! Before starting to sew anything together though I decided to paint the Yin-Yang symbols on his sleeves; I did this at home because, ironically enough, I'd have more table space for painting in my ridiculously tiny apartment than on the big shared table in the sewing class. ._. I also dislike being stuck sitting between two other strangers and having their stuff scattered around mine on the table so that I can't rotate my fabric –and move around the table– to get the best painting angles...

Yin-Yang design sketched onto the sleeves. I used those circular
objects to get perfect circles ~
Painted sleeves, booyah!
Because I didn't have a perfect fabric paint color I was constantly mixing the dark orange with white while I painted on the fabric. I always did the orange first and then took some white and blended it in before the paint had time to dry – this made the end result look more lively because it's not all just a single shade. :) I'm satisfied with the outcome. Oh, and I of course set the paint after it had dried completely by ironing on the "wrong side", 5 minutes per sleeve.

Hmmm...
I'm starting to feel like this post is getting long (no shit Sherlock!) so I'm just gonna split it once more and save the rest for a third part. ^^ I'll maybe include some wig testing on the next part so stay tuned!

October 20, 2015

Samurai Deeper Kyo's Hotaru cosplay progress part.1

What's up everyone?

I've started working on my next cosplay – Hotaru from Samurai Deeper Kyo!
I've been wanting to cosplay him ever since I first read the manga back in mid-late 2012. He's just such an awesome character so that, even after all these years, my cosplay wants didn't fade a single bit. SDK is one of my favorite shounen mangas and I wish that more people knew and cosplayed from it...

Now that I'm back in school and I got to continue my sewing classes I decided that it was finally time to make this cosplay into reality!
To start I went to check what fabrics mom had available on the 5th September. I don't want to buy fabrics if mom has usable ones in the attic because hey, free fabrics! o/


This time I was lucky! I found all the fabrics I needed, save for white cotton for the main kimono's body. This means that the only fabric I will actually need to go buy is the white fabric – and probably some fabric paint. 

Most cosplayers that I see online cosplay Hotaru with red pants and red collars on his white kimono. Personally I always viewed these parts as some middle-ground between orange and red. I honestly think that it looks a bit boring/bland when it's all only red (even his inner shirt is red) – I wanted to have a bit more variation, aka color. Because of this I decided to use a flaming reddish orange fabric for his pants and collars and besides, on some official art these parts do have an orange touch to them.. so I don't think that I'm being horribly inaccurate either. Huhuhu ~

SDK Hotaru reference.
So yeah, I started out by making his headband. Super easy; I just took some red rib knit fabric, folded the width in half and sewed it together.

After that it was time for the inner shirt. I used red linen for it. Actually the whole cosplay I made in school, during my handicraft classes, because why the hell not?
I decided to make the shirt as a sleeveless very loose-fitting top. I wanted it to kinda "hang" in the front (because that's how I always imagined it) so we cut the front pattern's upper part into pieces and spread it out for extra width.

I apologize for the crummy cellphone-quality photos ahead; I didn't have my SLR camera with me in school during this project. Most photos show the colors reaaaaally wrong.

Shirt pattern making going on.
I first did a mock-up prototype out of some scrap fabric to check if the shirt's front worked it did. I then cut out the front and back piece out of the linen fabric. After I had cut out the pieces I used the school's overlock machine to sew around all the edges (same purpose as zigzaging) and well, after that you don't use the overlock anymore. This is seemingly the professional/right way to do it, according to my teacher who has studied sewing in some proper school...

All the edges "zigzaged" with overlock.
Gotta love this thing, everything looks so neat!
With that done I sewed the shoulder and side seams closed, easy peasy. After that I noticed that because I had used a non-matching thread for the overlock the beige threads would show in the arm openings so, err, I had to hide that somehow. if you wonder why I simply didn't change for red overlock threads then that's because school's thread color choices are super limited... 
So yeah, I made some extra curved pieces (from my very last scrap pieces – talk about no fabric waste!) to sew onto the arm openings to hide the overlock seams. I have no idea what the proper name is for these. OTL

Sewing on the... things... whatever-they're-called.
I used the iron to get them to stay in place, aka on the shirt's inside. I put a wet rag on top of the spot that I wanted to iron and I then pinned the "flap" in place so that the seam would, after being ironed, be set on the inside. The iron I set to max heat (because linen) and then I just pressed it on the fabric and let it be still until the sizzling sound of the water/steam faded. After that was done I sewed them down at the shoulder and side seams (nowhere else, only two attachment points) so that they wouldn't flop over on the showing side and look ugly. I sewed exactly on top of the existing seams (on the right side) so that the seams holding the "curved arm pieces" would be close to invisible.

Ironed.
With that done I only had left to finish the hem and the collar. Nothing weird here – I just folded the edges in twice and sewed a straight stitch all around and then it was done.

Next up were the pants. My teacher didn't even bother to use a pattern for it, so I just scribbled some measures down and then she drew directly on the fabric and just cut the shit out. I'm not too sure how good of an idea this was because later on a lot of things ended up being different lengths; too long, too short, too narrow, not aligned etc.
Once again I started by using the overlock machine and sewing all around the edges on all pieces. Then, naturally, I sewed the crotch/butt seams. Next I put the side seams together and that's when I tried the pants on for the first time – just to notice that they barely went past my ass. It still worked but it was way too tight for comfort... and the meh part was that I had zero leftover fabric!
The pant legs were way too long – they were full length when they were supposed to only reach slightly below my knees. D: So yeah, I cut off like 30 cm from both legs and then, to get more width to the waist, I had to use the scrap fabric I had just gotten from the too-long-legs.

Pant legs shortened. (one piece spread out and put to the top)
I just cut up the side seams I had just done, to save time. I then cut the scrap pieces from the legs into triangles and sewed them to the sides of the pants.
Next up was sewing the waist; I left a gap so that I could thread the elastic ribbon through when done but oh boy did I rage on this. I basically just folded the top and sewed a straight stitch all around, leaving a hole for the elastic. Little did I know that doing this super simple task proved to be the most frustrating part of the whole pants. xD The fabric seriously was alive; it twisted and turned and made ugly bumps and folds all over and I had to pick up the seam ripper and undo the whole thing. I cursed the pants to the depths of hell lol.

Turned severed pant legs into triangles for extra width...
I had to do tacking stitches and iron the waist to get the fabric to lay still and well, it still managed to move around when sewing. Fuck you, fabric. Oh well, at least it turned out better than on my first run so I didn't rip it up again; it's still rather not-so-pretty on the inside (luckily it doesn't show on the outside) but whatever, no one's gonna see it except me so lolol.

Tacking threads on waist fold...
I hemmed the pant legs no problem and then I just ironed the seams open and my pants were done. Oh, and I had to cut off like 5 cm from each leg earlier because the front and back sides of the legs totally didn't match. >_> It was either cut the legs shorter or have the butt and crotch seams being horrrrrrrribly mismatched. By some miracle the pant legs were still, even after that forced shortening, a suitable length for Hotaru. What the heck man.

I'm not all that super pleased with the pants; I might redo them one beautiful day... if I can be bothered. But they'll suffice for now.

On the next Hotaru costume progress post I'll make both the inner and the outer kimono, the obi and possibly some of the other small details, like his ear decorations. See ya!