
Hello costumers and hunters alike!
Here comes the fifth part of my bigass Monster Hunter cosplay project – I'm making a Hunting Horn called Eldaora's Taus from Monster Hunter 4 Ultimate.
I've been a dedicated fan of the game series since I touched Freedom Unite and now I'm
finally making one of my cosplay dreams come true – a MonHun costume!
I am for now just doing the weapon but I will make an armor
set later, to go with this build.
No idea what I've done before this? :D No worries, the previous parts of this project can be found here: 1, 2, 3, 4
No idea what I've done before this? :D No worries, the previous parts of this project can be found here: 1, 2, 3, 4
Note: this project is split into several parts because otherwise it
would turn into a kilometer post; I need to document my progress
carefully (many photos etc) since it's a school project.
Let's go, yo-ho!
Let's go, yo-ho!
 |
| Added filler to the face. |
So, remember that little tube of filler that stepdad brought when I ran out of the original filler that I was using? I used it up in like 30 minutes. xD He then came with a 3 kilo bucket on the following day and, honestly, I've used up half of it as well just trying to cover up this thing. I don't want to think about it but I've probably used like 5 kilos worth of filler on this project by now...
Doing the whole filler covering is really tedious and time-consuming. I mean, every time I add filler somewhere I have to wait for it to dry before I can rotate this thing, on the floor, to get to the opposite side. The more filler there is the longer it takes to dry (thicker layers dry slowly) and yeah, this part of the process has taken up a lot of time.
The last parts that I added filler to was all the spots that were hard to reach – like all the deep and narrow splits separating the "hair bananas" on the back mane, for example. Once that was done I left it to dry for some days.
Around mid-May I returned to mom's to work on this project. Next up was to sand the whole thing to make it smoother. It's not super visible on the photos how uneven it was after the filler but below is a close-up on which you can really see the uneven and textured surface.
So what do I do? I bring out all the sand papers and get to work, of course! It needs to be mentioned that so far I've done all of the work inside the garage, but for the sanding process I carried the Hunting Horn outside and put it on a working table. Mainly to make cleaning easier afterwards and the weather was nice.
Okay, I'm not gonna lie – I had somehow underestimated how much time sanding actually takes. Like I've done it a lot in my life but still I had not counted it into my plans and it was just this "nah, it'll just take a couple hours tops and then I can move on to the next thing". Oh, so wrong I was. xD
So yeah, even just the rough sanding (60 grit sand paper) took 6+ hours. Guess if I was sick and tired of sanding after a while? I was. It was really tedious and I just wanted to get it done so that I could get forward since, at this point, I was really stressed about potential deadlines.
I didn't actually do any sanding with finer grit papers since it felt like it would be impossible to get it perfectly smooth and even anyway... especially something of this size. There's a myriad of spots where the foam still peeks through and the foam has all these small air bubbles etc and it's just never gonna be a perfect porcelain finish, lol. Anyone who has worked with expanding foam knows what kind of texture it has – it just felt like a lot of time and work just to make it "a little less uneven", if that makes sense. Also, a lot of the filler was unevenly applied as well, meaning that even after sanding the surface random holes and level differences kept appearing, making the surface bumpy and lively. It's really hard to explain but it's this thing that when you apply an amount of filler to a surface and let it dry, it will show its undermost "layers" (in the exact same position they originally hardened in) once you sand through the outer layers.
Oh well, at this point I just decided that screw perfection and let's go for a more realistic and battle-worn appearance instead. I mean, in the Monster Hunter games any weapon would be made from slain monster materials: fangs, claws, scales, shells, wing webbings and the list goes on. Oh and yes, slain monsters, meaning that a hunter –or a group of them– has been beating the poor monster to death with various weapons ranging from Great Swords to Hammers and Bows. :D So yeah, with that logic the monster parts used, most likely, were far from in pristine condition and came with whatever bumps, dents and cuts that the hunters inflicted during the hunt...
The Eldaora's Taus is made from materials from the (rusted) Kushala Daora, a powerful Elder Dragon with metal skin and wind-controlling abilities. Hence why I'm gonna paint this thing a metallic silver later on and add rusted accents, just like in the references and in the game.
As you can see in the art book it looks different from the game (I don't own the art book, a fellow MonHun fan sent this to me online!) and because I had no access to the art book I based my representation of the weapon on the in-game model and took multiple artistic liberties to make my life easier while making it. As I've mentioned in earlier progress posts it's thus not 100% accurate and that's a choice I made during the process to save my sanity.
Okay so, back to the sanding. I didn't even bother to sand it perfectly even and there are small imperfections everywhere. At this point I just don't have an infinite amount of time left on this project and thus I decided to just make it more realistic instead, as mentioned above.
But yeah, after all that tedious sanding there was a shitlot of white filler dust everywhere and yes, in every single hard-to-reach crevice on the damn Horn. Good thing stepdad has this special cousin to the common vaccuum cleaner that is just right for the task!
I carefully vaccuumed all over the Hunting Horn, every nook and every cranny, to get rid off as much loose dust as possible. This took quite some time. Before I even started vaccuuming it I could slap the Horn anywhere and these huge white clouds of dust would just explode out of it and float everywhere. xD There was a lot of dust, seriously. My working clothes were all white from it...
Oh and yeah, all that white dust left on the table? I threw it out in the backyard and hey, over at my Instagram you can see how I made some unintentional art with it!
I noticed a not-so-fun thing soon after. :( You see, because both filler and PU-foam are kinda soft and porous materials they get dented easily. I noticed during the sanding that these weird dent lines had appeared at the shaft and I wondered where they had come from – turned out it was from the pressure of the shaft hanging off the table's edge and being pressed down from the weight of the Hunting Horn's main body, against the table.
Those dents pictured above were actually some of the smaller ones. There was this approximately 15 cm long deep dent on one of the "hair bananas" as well. I was not happy when I saw it. Oh well, no can do but to go back to the filler stage and cover up the dents.
I left it to dry over a couple days and when I came back I sanded it down, to make it look like nothing had happened to it. At this point I also started thinking that if it already takes notable surface damage from minor pressure etc then God knows how much damage it would suffer when taken to a full day at an anime convention!
My grinding gears were grinding, fast – I had to figure out what to do to make it more tolerant to outer impacts; I needed to make its surface harder. I mean seriously, nothing would suck more than doing all that intricate painting work and then have the whole thing dented or chip off because of the surface below the paint not being strong enough. It would be so frustrating!
My first thought was to cover it in worbla but then I realized that it would need a lot of worbla sheets and worbla is expensive. I then remembered reading some expanding foam prop tutorials on which it was recommended to cover the surface of the foam with papier-maché, probably the most known way to do it but honestly, I don't really like working with papier-maché and would rather avoid it, if possible (it's so messy and tedious). :/ Besides, it would be incredibly time-consuming to cover a build of this size and especially considering that papier-maché requires several layers. I just don't have the time nor patience for that right now and so I looked around for other solutions. I even considered Plasti-Dip (never used it before) but scrapped that idea because I read somewhere that it doesn't really add hardness.
Another problem that made this whole coating issue a bit more troublesome was the fact that the Hunting Horn is already really heavy for a cosplay prop, probably weighing in at anywhere between 10-20 kg for the moment – not gonna lie, it's easily my heaviest prop to date. I'm bad at guessing weight but it's definitely heavy enough to be impossible to lift with one arm and it's even harder to carry since the weight is not balanced at the center but at the main bulk of the body, meaning the head area. So yeah, in other words I ain't gonna easily be swinging this thing around by holding it at the shaft, not even with both arms.
In other words – I must try to keep the weight down as much as possible, which also limits my choices; no one wants to carry around a heavy-ass prop for a whole day at a convention. I've honestly been thinking about the weight all along during this process (hence my material choices) but even with that in mind the extreme size and unbalanced bulk of the prop takes its toll along the way. I'm sure there would have been lighter and more convenient options on how to build this thing but this is all a big learning experience for me and my first big and challenging prop in this caliber.
So yeah, I ruled out worbla and Plasti-Dip. I also didn't want to invest in any of the resins nor fiber glass because I lack the know-how and don't feel comfortable getting into toxic materials yet. Stepdad pulled a blank when I asked him (much to my surprise) and so, after thinking and searching, I figured that my cheapest and easiest choice would probably be to just go ghetto and use the old glue-and-water trick. It's probably not the most effective option out there but I've used it before to seal/harden stuff like craft foam and it has done its job decently enough to get a pass – and it shouldn't be one of those materials that dissolves the PU-foam either.
On early September I returned to try the glue trick. Stepdad suggested not diluting the glue to avoid it getting too runny and thus not very effective. I decided to heed his advice, it's worth a try to see if it's possible to just directly brush the glue on and have it harden nicely without making the surface all streaky and ugly.
I
used normal white glue that you can find in most stores. The brand I
used is Eri Keeper (Finnish brand) but any PVA-based glue should work. To my relief the glue seems to work decently – it doesn't turn rock-hard or anything but it clearly stiffens up the surface a bit, while still keeping the elasticity, and gives it a nice shiny coating (no visible brush streaks!) as well. I'll need to do a couple or so layers but it works and that's the main point.
I ran out of glue before I got done with the front (this thing just ate it up!) and thus took a break from gluing and went to finally do some more progress on the protruding parts – the horns and ears.
My original plan was to cover these in expanding foam and carve them out but yeah, the more I thought about it the more I felt like there had to be a better option. I had previously made the base shape for the horns and ears out of wire net.
After some thinking I remembered that I have two big rolls of black worbla, a thermoplastic used by cosplayers, lying around in the storage; I ordered them some years ago from Germany and have barely used them. The drawback with worbla is that it's so expensive and I haven't used it much, so this will be my first time using worbla for covering some more complicated shapes. I've only done really simple stuff with it before. ^^"
I needed to cover the horns and ears in something to make the worbla have some sort of surface to stick to, especially since the wire net has holes all over it and well, when the worbla gets heated up it gets soft and malleable and would probably just sink through the holes... or something.
Budget thinking led me to use extra-strong aluminium foil; it should be able to stand the warm worbla being applied on top and also provide enough support. I just basically wrapped the foil tightly around each shape and then just carefully pressed it down into a snug fit. I kept the foil together (the horns are made of several pieces of foil) by adding some masking tape to cover seams, edges and the like.
I'll get to the worbla part the next time – now I want to get the base treatment over first so that I can get to painting and attaching the protruding parts. So yeah, with the glue gone my work stood still. Stepdad suddenly remembered that he had some kind of leftover glue-ish filler lying around somewhere and went to fetch it – the plan was to experiment and see if it could do the same thing that the glue did, namely harden the surface.
Around mid-May I returned to mom's to work on this project. Next up was to sand the whole thing to make it smoother. It's not super visible on the photos how uneven it was after the filler but below is a close-up on which you can really see the uneven and textured surface.
 |
| Head before sanding. |
 |
| No one can say that there's not enough sand papers. |
So yeah, even just the rough sanding (60 grit sand paper) took 6+ hours. Guess if I was sick and tired of sanding after a while? I was. It was really tedious and I just wanted to get it done so that I could get forward since, at this point, I was really stressed about potential deadlines.
 |
| Rough sanding done. |
Oh well, at this point I just decided that screw perfection and let's go for a more realistic and battle-worn appearance instead. I mean, in the Monster Hunter games any weapon would be made from slain monster materials: fangs, claws, scales, shells, wing webbings and the list goes on. Oh and yes, slain monsters, meaning that a hunter –or a group of them– has been beating the poor monster to death with various weapons ranging from Great Swords to Hammers and Bows. :D So yeah, with that logic the monster parts used, most likely, were far from in pristine condition and came with whatever bumps, dents and cuts that the hunters inflicted during the hunt...
The Eldaora's Taus is made from materials from the (rusted) Kushala Daora, a powerful Elder Dragon with metal skin and wind-controlling abilities. Hence why I'm gonna paint this thing a metallic silver later on and add rusted accents, just like in the references and in the game.
 |
| Eldaora's Taus reference from a MonHun art book. |
Okay so, back to the sanding. I didn't even bother to sand it perfectly even and there are small imperfections everywhere. At this point I just don't have an infinite amount of time left on this project and thus I decided to just make it more realistic instead, as mentioned above.
But yeah, after all that tedious sanding there was a shitlot of white filler dust everywhere and yes, in every single hard-to-reach crevice on the damn Horn. Good thing stepdad has this special cousin to the common vaccuum cleaner that is just right for the task!
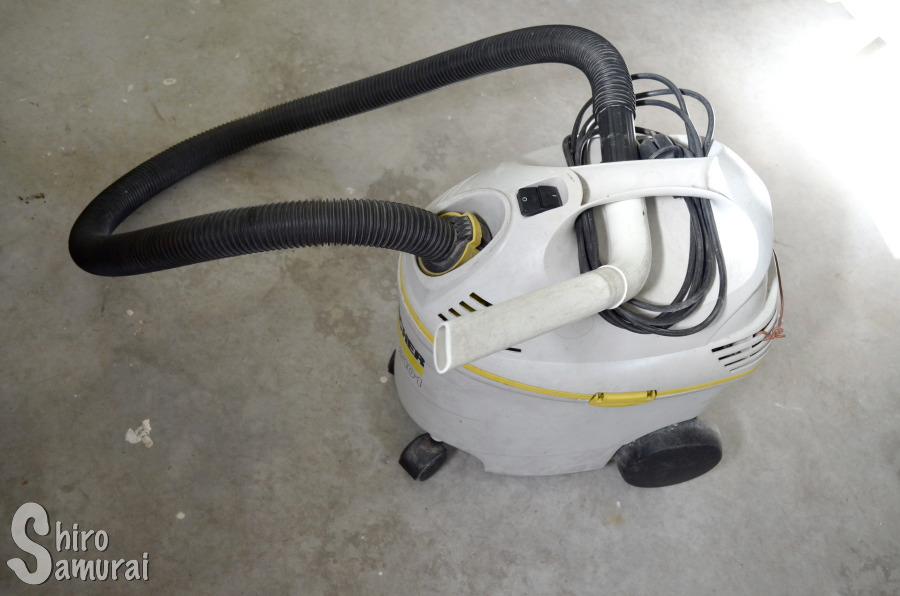 |
| Hello my best friend! |
Oh and yeah, all that white dust left on the table? I threw it out in the backyard and hey, over at my Instagram you can see how I made some unintentional art with it!
I noticed a not-so-fun thing soon after. :( You see, because both filler and PU-foam are kinda soft and porous materials they get dented easily. I noticed during the sanding that these weird dent lines had appeared at the shaft and I wondered where they had come from – turned out it was from the pressure of the shaft hanging off the table's edge and being pressed down from the weight of the Hunting Horn's main body, against the table.
 |
| Red arrows pointing at the dents formed from the table's edge. |
 |
| New filler added on marked areas (there were more) to cover up dents and holes in the foam. |
My grinding gears were grinding, fast – I had to figure out what to do to make it more tolerant to outer impacts; I needed to make its surface harder. I mean seriously, nothing would suck more than doing all that intricate painting work and then have the whole thing dented or chip off because of the surface below the paint not being strong enough. It would be so frustrating!
My first thought was to cover it in worbla but then I realized that it would need a lot of worbla sheets and worbla is expensive. I then remembered reading some expanding foam prop tutorials on which it was recommended to cover the surface of the foam with papier-maché, probably the most known way to do it but honestly, I don't really like working with papier-maché and would rather avoid it, if possible (it's so messy and tedious). :/ Besides, it would be incredibly time-consuming to cover a build of this size and especially considering that papier-maché requires several layers. I just don't have the time nor patience for that right now and so I looked around for other solutions. I even considered Plasti-Dip (never used it before) but scrapped that idea because I read somewhere that it doesn't really add hardness.
Another problem that made this whole coating issue a bit more troublesome was the fact that the Hunting Horn is already really heavy for a cosplay prop, probably weighing in at anywhere between 10-20 kg for the moment – not gonna lie, it's easily my heaviest prop to date. I'm bad at guessing weight but it's definitely heavy enough to be impossible to lift with one arm and it's even harder to carry since the weight is not balanced at the center but at the main bulk of the body, meaning the head area. So yeah, in other words I ain't gonna easily be swinging this thing around by holding it at the shaft, not even with both arms.
In other words – I must try to keep the weight down as much as possible, which also limits my choices; no one wants to carry around a heavy-ass prop for a whole day at a convention. I've honestly been thinking about the weight all along during this process (hence my material choices) but even with that in mind the extreme size and unbalanced bulk of the prop takes its toll along the way. I'm sure there would have been lighter and more convenient options on how to build this thing but this is all a big learning experience for me and my first big and challenging prop in this caliber.
So yeah, I ruled out worbla and Plasti-Dip. I also didn't want to invest in any of the resins nor fiber glass because I lack the know-how and don't feel comfortable getting into toxic materials yet. Stepdad pulled a blank when I asked him (much to my surprise) and so, after thinking and searching, I figured that my cheapest and easiest choice would probably be to just go ghetto and use the old glue-and-water trick. It's probably not the most effective option out there but I've used it before to seal/harden stuff like craft foam and it has done its job decently enough to get a pass – and it shouldn't be one of those materials that dissolves the PU-foam either.
On early September I returned to try the glue trick. Stepdad suggested not diluting the glue to avoid it getting too runny and thus not very effective. I decided to heed his advice, it's worth a try to see if it's possible to just directly brush the glue on and have it harden nicely without making the surface all streaky and ugly.
 |
| First layer of glue hardened on the shaft. Notice the shine! |
 |
| One thick layer of glue added. |
My original plan was to cover these in expanding foam and carve them out but yeah, the more I thought about it the more I felt like there had to be a better option. I had previously made the base shape for the horns and ears out of wire net.
After some thinking I remembered that I have two big rolls of black worbla, a thermoplastic used by cosplayers, lying around in the storage; I ordered them some years ago from Germany and have barely used them. The drawback with worbla is that it's so expensive and I haven't used it much, so this will be my first time using worbla for covering some more complicated shapes. I've only done really simple stuff with it before. ^^"
I needed to cover the horns and ears in something to make the worbla have some sort of surface to stick to, especially since the wire net has holes all over it and well, when the worbla gets heated up it gets soft and malleable and would probably just sink through the holes... or something.
 |
| #grillivartaat :DD |
I'll get to the worbla part the next time – now I want to get the base treatment over first so that I can get to painting and attaching the protruding parts. So yeah, with the glue gone my work stood still. Stepdad suddenly remembered that he had some kind of leftover glue-ish filler lying around somewhere and went to fetch it – the plan was to experiment and see if it could do the same thing that the glue did, namely harden the surface.
 |
| Renovation filler. |
I feel like this post is getting a bit too long right now so I'll just split it here and yeah, keep your eyes peeled for part 6!
No comments:
Post a Comment
Consider dropping me a comment if you enjoyed this post. (´∀`○)
Maybe you got inspired, learned something new or you have some other things you want to tell me? Don't hesitate if you have something to say – I'd love to hear from you!